
A Simple Touchscreen Sketchpad using Javascript and HTML5
From an original image by Sean MacEntee
With the release of Windows 8, and the huge popularity of iPads and Android tablets, touchscreen is being built into more and more traditional PCs.
However, seeing dedicated touchscreen features on websites is still comparatively rare.
Here we’ll show you how to use some basic HTML and Javascript to add a simple touch-enabled sketchpad to a page.
We’re not trying to build a full-featured touchscreen app here – just a simple, very lightweight sketchpad, but it should be enough to show you some of the basic ideas behind touch support on the web.
If you are thinking of making a full HTML 5 touchscreen site or app, you might want to check out something like jQuery Mobile, however it’s worth going through the pure Javascript version here to get an understanding of the interactions between the HTML 5 canvas, and the mouse and touchscreen functions.
Compatibility note: We going to use the most common “Touch Events” approach here which is supported by all browsers on iOS and Android. Unfortunately, this won’t work directly on Windows 8 touchscreen when using Internet Explorer, however, it can be adapted relatively easily using the alternative “Pointer Events” model.
See the “Supported browsers” note towards the end of the article for more information.
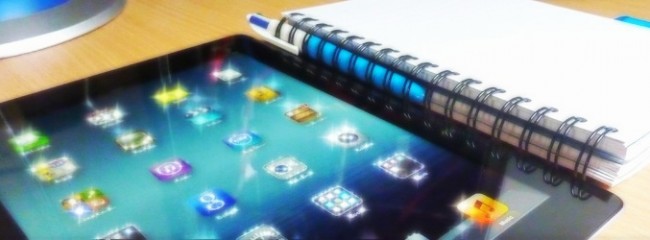
Blank paper
First, we need something to draw on. Let’s start with a web-page with some text, and an area beside it for sketching. We can use the HTML 5 canvas tag to create our sketchpad area.
Edit the HTML for your page, add the canvas tag with an id name of your choice, and change the dimensions to fit your layout.
<canvas id="sketchpad" width="400" height="300"></canvas>This creates our blank canvas. Now let’s try to make it into a working sketchpad. We can do this using the mouse first, then add touchscreen support later.
So what happens in a sketchpad?
When the cursor/pointer is over the sketchpad, and a mouse button pressed, then we want to draw something at that location.
Since our drawing action will take place when the mouse button is pressed down, we can put all of our code into a function that’s called when this happens.
We need two things:
- A function to draw a dot (filled circle) at the specified location on the canvas
- A way to call this function when the mouse button is being held down, and give it the current position of the mouse
Let’s try to do the drawing function first.
We need to write some small Javascript code to do this.
<script type="text/javascript">
    // Get the specific canvas element from the HTML document
    var canvas = document.getElementById('sketchpad');

    // If the browser supports the canvas tag, get the 2d drawing context for this canvas
    if (canvas.getContext)
        var ctx = canvas.getContext('2d');

    // Draws a dot at a specific position on the supplied canvas name
    // Parameters are: A canvas context, the x position, the y position
    function drawDot(ctx,x,y) {
        // Let's use black by setting RGB values to 0, and 255 alpha (completely opaque)
        r=0; g=0; b=0; a=255;

        // Select a fill style
        ctx.fillStyle = "rgba("+r+","+g+","+b+","+(a/255)+")";
        // Draw a filled circle
        ctx.beginPath();
        ctx.arc(x, y, size, 0, Math.PI*2, true);
        ctx.closePath();
        ctx.fill();
    }
</script>
Now we can draw on the canvas at a location of our choice, using the drawDot function.
When to Draw
When do we want to draw a dot on the sketchpad?
There are two cases (assuming the mouse is positioned over the sketchpad):
- Immediately after the mouse button is pressed
- Immediately after moving the mouse with the button held down
There is a slight complication here, since we can’t directly check if the mouse button is being held down using Javascript.
We have to keep track of when the button is pressed and released ourselves, in order to determine whether it’s currently being held down.
Tracking the mouse
Image credit: Sonja Trpovski
In fact, we have 3 useful triggers or “events” to help us keep track of the mouse:
- mousedown event – Activated once whenever the (left) mouse button is pressed.
- mouseup event – Activated once whenever the (left) mouse button is released.
- mousemove event – Activated each time that the mouse is being moved, regardless of the button state.
So, we will need to keep track of the mouse button status by using the mouseup and mousedown triggers.
Additionally, we can use mousemove to do something useful when the mouse is being moved.
What happens with these events normally?
Nothing happens – We will need to add event handlers to tell the browser to do something when that specific event is triggered.
Event handlers
What each handler will do is simply call a function of our choice immediately after the event is triggered. So we should have one function for each event.
Let’s call them sketchpad_mouseDown, sketchpad_mouseUp and sketchpad_mouseMove.
We’ll also use our own getMousePos function to get the current co-ordinates of the mouse pointer when it’s moved.
<script type="text/javascript">
    // Define some variables to keep track of the mouse status
    var mouseX,mouseY,mouseDown=0;

    function sketchpad_mouseDown() {
        mouseDown=1;
        drawDot(ctx,mouseX,mouseY);
    }

    function sketchpad_mouseUp() {
        mouseDown=0;
    }

    function sketchpad_mouseMove(e) {
        // Update the mouse co-ordinates when moved
        getMousePos(e);

        // Draw a pixel if the mouse button is currently being pressed
        if (mouseDown==1) {
            drawDot(ctx,mouseX,mouseY);
        }
    }

    // Get the current mouse position relative to the top-left of the canvas
    function getMousePos(e) {
        if (!e)
         var e = event;

        if (e.offsetX) {
            mouseX = e.offsetX;
            mouseY = e.offsetY;
        }
        else if (e.layerX) {
            mouseX = e.layerX;
            mouseY = e.layerY;
        }
    }
</script>
So now we have our 3 event handlers each performing a function –
- sketchpad_mouseDown – registers a mouse click and also draws a pixel at the current position.
- sketchpad_mouseUp – simply de-registers the mouse click, so we know that the button is no longer being pressed.
- sketchpad_mouseMove – checks to see if the mouse button is currently down, and if so, draws something at the current location.
- getMousePos – updates our mouseX and mouseY variables with the current position of the mouse.
All we have to do now is attach our event handlers to the events themselves.
canvas.addEventListener('mousedown', sketchpad_mouseDown, false);
canvas.addEventListener('mousemove', sketchpad_mouseMove, false);
window.addEventListener('mouseup', sketchpad_mouseUp, false);
You might notice that we are using addEventListener with the canvas element in the first two cases, and then with “window” for the mouseup event.
This is because for mouse downs and mouse moves, we’re only interested when these happen over our sketchpad canvas.
However, someone could click the mouse button on the canvas, then keep it held down, but move the mouse to another part of the web page. If they then release the mouse button, we won’t see this event happening if we’re just looking at the canvas, and our mouse button tracking can become confused, and not register the button being released.
In order to avoid this, we will listen in the entire window for mouse up events, so that we can track them correctly even if they happen outside of our sketchpad box.
Note: You can also use “document.body” instead of window, however since our example is being displayed in this post within an iframe, using “window” should capture the mouseup event outside of the iframe, whereas using “document.body” won’t.
Putting it all together
Here’s what our mouse-based sketchpad looks like right now (try it!):
(Look further down this article for the full touchscreen version)
… and here’s the complete web-page code for the mouse-based version:
sketchpad-mouse.html (text file)
<html>
<head>
<title>Sketchpad</title>

<script type="text/javascript">
    // Variables for referencing the canvas and 2dcanvas context
    var canvas,ctx;

    // Variables to keep track of the mouse position and left-button status
    var mouseX,mouseY,mouseDown=0;

    // Draws a dot at a specific position on the supplied canvas name
    // Parameters are: A canvas context, the x position, the y position, the size of the dot
    function drawDot(ctx,x,y,size) {
        // Let's use black by setting RGB values to 0, and 255 alpha (completely opaque)
        r=0; g=0; b=0; a=255;

        // Select a fill style
        ctx.fillStyle = "rgba("+r+","+g+","+b+","+(a/255)+")";

        // Draw a filled circle
        ctx.beginPath();
        ctx.arc(x, y, size, 0, Math.PI*2, true);
        ctx.closePath();
        ctx.fill();
    }

    // Clear the canvas context using the canvas width and height
    function clearCanvas(canvas,ctx) {
        ctx.clearRect(0, 0, canvas.width, canvas.height);
    }

    // Keep track of the mouse button being pressed and draw a dot at current location
    function sketchpad_mouseDown() {
        mouseDown=1;
        drawDot(ctx,mouseX,mouseY,12);
    }

    // Keep track of the mouse button being released
    function sketchpad_mouseUp() {
        mouseDown=0;
    }

    // Keep track of the mouse position and draw a dot if mouse button is currently pressed
    function sketchpad_mouseMove(e) {
        // Update the mouse co-ordinates when moved
        getMousePos(e);

        // Draw a dot if the mouse button is currently being pressed
        if (mouseDown==1) {
            drawDot(ctx,mouseX,mouseY,12);
        }
    }

    // Get the current mouse position relative to the top-left of the canvas
    function getMousePos(e) {
        if (!e)
            var e = event;

        if (e.offsetX) {
            mouseX = e.offsetX;
            mouseY = e.offsetY;
        }
        else if (e.layerX) {
            mouseX = e.layerX;
            mouseY = e.layerY;
        }
     }


    // Set-up the canvas and add our event handlers after the page has loaded
    function init() {
        // Get the specific canvas element from the HTML document
        canvas = document.getElementById('sketchpad');

        // If the browser supports the canvas tag, get the 2d drawing context for this canvas
        if (canvas.getContext)
            ctx = canvas.getContext('2d');

        // Check that we have a valid context to draw on/with before adding event handlers
        if (ctx) {
            canvas.addEventListener('mousedown', sketchpad_mouseDown, false);
            canvas.addEventListener('mousemove', sketchpad_mouseMove, false);
            window.addEventListener('mouseup', sketchpad_mouseUp, false);
        }
    }
</script>

<style>
/* Some CSS styling */
#sketchpadapp {
    /* Prevent nearby text being highlighted when accidentally dragging mouse outside confines of the canvas */
    -webkit-touch-callout: none;
    -webkit-user-select: none;
    -khtml-user-select: none;
    -moz-user-select: none;
    -ms-user-select: none;
    user-select: none;
}
.leftside {
    float:left;
    width:220px;
    height:285px;
    background-color:#def;
    padding:10px;
    border-radius:4px;
}
.rightside {
    float:left;
    margin-left:10px;
}
#sketchpad {
    float:left;
    border:2px solid #888;
    border-radius:4px;
    position:relative; /* Necessary for correct mouse co-ords in Firefox */
}
</style>
</head>

<body onload="init()">
    <div id="sketchpadapp">
        <div class="leftside">
             Simple mouse-based HTML5 canvas sketchpad.<br/><br/>
             Draw something by holding down the mouse button or using single clicks.<br/><br/>
             On a touchscreen, tapping the area will register as a single mouse click.<br/><br/>

             <input type="submit" value="Clear Sketchpad" onclick="clearCanvas(canvas,ctx);">
        </div>
        <div class="rightside">
            <canvas id="sketchpad" height="300" width="400">
            </canvas>
        </div>
    </div>
</body>
</html>
Note that we have moved the initialisation of the canvas context and event handlers into a separate “init()” function that is called just after the page has finished loading (using “<body onload..>”).
We’ve also added a very simple “Clear” button which calls a function with a single line of code to clear the canvas.
Prevent nearby text being accidentally selected
You might notice that we’ve used this block of styling in the CSS of the div surrounding the sketchpad:
-webkit-touch-callout: none;
-webkit-user-select: none;
-khtml-user-select: none;
-moz-user-select: none;
-ms-user-select: none;
user-select: none;
This is due to the fact that when you have a large area on the screen that involves dragging the mouse across, the mouse cursor can sometimes stray outside of this area.
When this happens, because the mouse button is being held down, it’s interpreted by the web browser as a request to select areas of text. This produces a distracting flash of highlighting on the page.
To prevent this happening, we can just use the above user-select statements in the relevant CSS area to prevent text surrounding the sketchpad from being “selectable”.
Adding Touchscreen support

Image Credit: Melanie Davies
If you just want to play around with a touchscreen interface, it might seem like a lot of effort adding all of the mouse support above.
However, the touchscreen code is very similar to the mouse-based sketchpad code, so it’s useful to understand how the mouse version works before looking at touchscreen. Also, in most cases you’ll want to have a functioning mouse version working as a fallback.
Touch events
If you try the current mouse-based version on an iPad, it’s not very appealing. Moving your finger over the sketchpad scrolls it, and you can just about make a blot appear if you press on a single area.
This is because we’re not yet listening to the specific events that are being triggered when the canvas area is touched.
We are getting some limited interaction with a single tap on the sketchpad – this is because the tap is also being interpreted as a mouseclick, and so it will (eventually) fire the mousedown event handler.
However, there is a 300ms delay when using the mouse events like this on a touchscreen device.
This is because the device is waiting to see if the single-tap is actually a double-tap. When we add our touch event handlers, we won’t need to worry about this quirk, since the touch events are triggered instantly after touching the screen.
Just like the mouse version, we have access to at least 3 useful touch-based events:
- touchstart event – Activated whenever a touch is registered on the associated area.
- touchend event – Activated whenever a touch is released from the associated area.
- touchmove event – Activated whenever a touch movement is detected in the associated area.
Let’s look at the code for dealing with these events.
We’re going to keep this code separate from the mouse-handling code, which leads to some bloat, but gives a bit more flexibility in cases where you need to perform a specific action only in response to a touch event.
Also, the code is a little simpler, since we don’t need to keep track of anything like the mouse button status – when a touchmove event is fired, we can already assume the equivalent of “the mouse button is being pressed” is happening.
We also don’t really need to do anything with the touchend event in this case, however you might need to add it in a more complex application to perform an event when a finger is lifted off the screen – for example to update some values. In this case, just copy the format of the touchstart event handler.
Note also that we’re just going to deal with non-multitouch support for the moment.
If you are working with a complex multitouch site or potential HTML app, you might want to look into something like hammer.js.
Here are the functions that we’re going to trigger on touch events.
<script type="text/javascript">
    // Define some variables to keep track of the touch position
    var touchX,touchY;

    function sketchpad_touchStart() {
        getTouchPos();
        drawDot(ctx,touchX,touchY,12);

        // Prevents an additional mousedown event being triggered
        event.preventDefault();
    }

    function sketchpad_touchMove(e) {
        // Update the touch co-ordinates
        getTouchPos(e);

        // During a touchmove event, unlike a mousemove event, we don't need to check if the touch is engaged, since there will always be contact with the screen by definition.
        drawDot(ctx,touchX,touchY,12);

        // Prevent a scrolling action as a result of this touchmove triggering.
        event.preventDefault();
    }

    // Get the touch position relative to the top-left of the canvas
    // When we get the raw values of pageX and pageY below, they take into account the scrolling on the page
    // but not the position relative to our target div. We'll adjust them using "target.offsetLeft" and
    // "target.offsetTop" to get the correct values in relation to the top left of the canvas.
    function getTouchPos(e) {
        if (!e)
            var e = event;

        if (e.touches) {
            if (e.touches.length == 1) { // Only deal with one finger
                var touch = e.touches[0]; // Get the information for finger #1
                touchX=touch.pageX-touch.target.offsetLeft;
                touchY=touch.pageY-touch.target.offsetTop;
            }
        }
    }
</script>
Prevent screen scrolling on touch-enabled elements
A very important part of adding touch support to a page is working out which elements should be immune to scrolling the page by swiping up or down.
There are some ergonomic considerations here – you don’t want to confuse the user by having large swathes of the screen un-scrollable. The key is to have intuitive, reasonably sized areas that perform some action based on touch, that don’t also scroll the page.
To prevent scrolling on individual page elements, we need to call the Javascript preventDefault() function at the end of our touchmove handler. You can see this in the sketchpad_touchMove function above.
Remember that we still have to attach our touch handlers above to the correct elements on the page.
We can do this as follows:
canvas.addEventListener('touchstart', sketchpad_touchStart, false);
canvas.addEventListener('touchmove', sketchpad_touchMove, false);
Note that we’re only attaching the event listeners to the canvas element.
If you decide to attach these listeners to a larger part of the page, or even the entire document, you would probably need to be careful in managing use of preventDefault() to stop swipe-scrolling – for example, you might only trigger it for certain touch co-ordinates or boundaries.
Also, even though we’re only capturing touchmove in relation to our canvas element, it will continue firing even if you drag outside of the canvas area, so be aware that the touch co-ordinates you get at this stage can be outside the bounds of the canvas.
Note that we’re using the most general form of retrieving the current “touch list” by using e.touches in getTouchPos().
You could also use something like e.targetTouches or e.changedTouches, which can give a slightly different list. This is more important for multi-touch applications though, compared to single-touch support.
Complete version
Now we have full touchscreen and mouse support:
… and here’s the complete code for the final version:
sketchpad-touch.html (text file)
<html>
<head>
<title>Sketchpad</title>

<script type="text/javascript">
    // Variables for referencing the canvas and 2dcanvas context
    var canvas,ctx;

    // Variables to keep track of the mouse position and left-button status
    var mouseX,mouseY,mouseDown=0;

    // Variables to keep track of the touch position
    var touchX,touchY;

    // Draws a dot at a specific position on the supplied canvas name
    // Parameters are: A canvas context, the x position, the y position, the size of the dot
    function drawDot(ctx,x,y,size) {
        // Let's use black by setting RGB values to 0, and 255 alpha (completely opaque)
        r=0; g=0; b=0; a=255;

        // Select a fill style
        ctx.fillStyle = "rgba("+r+","+g+","+b+","+(a/255)+")";

        // Draw a filled circle
        ctx.beginPath();
        ctx.arc(x, y, size, 0, Math.PI*2, true);
        ctx.closePath();
        ctx.fill();
    }

    // Clear the canvas context using the canvas width and height
    function clearCanvas(canvas,ctx) {
        ctx.clearRect(0, 0, canvas.width, canvas.height);
    }

    // Keep track of the mouse button being pressed and draw a dot at current location
    function sketchpad_mouseDown() {
        mouseDown=1;
        drawDot(ctx,mouseX,mouseY,12);
    }

    // Keep track of the mouse button being released
    function sketchpad_mouseUp() {
        mouseDown=0;
    }

    // Keep track of the mouse position and draw a dot if mouse button is currently pressed
    function sketchpad_mouseMove(e) {
        // Update the mouse co-ordinates when moved
        getMousePos(e);

        // Draw a dot if the mouse button is currently being pressed
        if (mouseDown==1) {
            drawDot(ctx,mouseX,mouseY,12);
        }
    }

    // Get the current mouse position relative to the top-left of the canvas
    function getMousePos(e) {
        if (!e)
            var e = event;

        if (e.offsetX) {
            mouseX = e.offsetX;
            mouseY = e.offsetY;
        }
        else if (e.layerX) {
            mouseX = e.layerX;
            mouseY = e.layerY;
        }
     }

    // Draw something when a touch start is detected
    function sketchpad_touchStart() {
        // Update the touch co-ordinates
        getTouchPos();

        drawDot(ctx,touchX,touchY,12);

        // Prevents an additional mousedown event being triggered
        event.preventDefault();
    }

    // Draw something and prevent the default scrolling when touch movement is detected
    function sketchpad_touchMove(e) {
        // Update the touch co-ordinates
        getTouchPos(e);

        // During a touchmove event, unlike a mousemove event, we don't need to check if the touch is engaged, since there will always be contact with the screen by definition.
        drawDot(ctx,touchX,touchY,12);

        // Prevent a scrolling action as a result of this touchmove triggering.
        event.preventDefault();
    }

    // Get the touch position relative to the top-left of the canvas
    // When we get the raw values of pageX and pageY below, they take into account the scrolling on the page
    // but not the position relative to our target div. We'll adjust them using "target.offsetLeft" and
    // "target.offsetTop" to get the correct values in relation to the top left of the canvas.
    function getTouchPos(e) {
        if (!e)
            var e = event;

        if(e.touches) {
            if (e.touches.length == 1) { // Only deal with one finger
                var touch = e.touches[0]; // Get the information for finger #1
                touchX=touch.pageX-touch.target.offsetLeft;
                touchY=touch.pageY-touch.target.offsetTop;
            }
        }
    }


    // Set-up the canvas and add our event handlers after the page has loaded
    function init() {
        // Get the specific canvas element from the HTML document
        canvas = document.getElementById('sketchpad');

        // If the browser supports the canvas tag, get the 2d drawing context for this canvas
        if (canvas.getContext)
            ctx = canvas.getContext('2d');

        // Check that we have a valid context to draw on/with before adding event handlers
        if (ctx) {
            // React to mouse events on the canvas, and mouseup on the entire document
            canvas.addEventListener('mousedown', sketchpad_mouseDown, false);
            canvas.addEventListener('mousemove', sketchpad_mouseMove, false);
            window.addEventListener('mouseup', sketchpad_mouseUp, false);

            // React to touch events on the canvas
            canvas.addEventListener('touchstart', sketchpad_touchStart, false);
            canvas.addEventListener('touchmove', sketchpad_touchMove, false);
        }
    }
</script>

<style>
/* Some CSS styling */
#sketchpadapp {
    /* Prevent nearby text being highlighted when accidentally dragging mouse outside confines of the canvas */
    -webkit-touch-callout: none;
    -webkit-user-select: none;
    -khtml-user-select: none;
    -moz-user-select: none;
    -ms-user-select: none;
    user-select: none;
}
.leftside {
    float:left;
    width:220px;
    height:285px;
    background-color:#def;
    padding:10px;
    border-radius:4px;
}
.rightside {
    float:left;
    margin-left:10px;
}
#sketchpad {
    float:left;
    height:300px;
    width:400px;
    border:2px solid #888;
    border-radius:4px;
    position:relative; /* Necessary for correct mouse co-ords in Firefox */
}
#clearbutton {
    font-size: 15px;
    padding: 10px;
    -webkit-appearance: none;
    background: #eee;
    border: 1px solid #888;
}
</style>
</head>

<body onload="init()">
    <div id="sketchpadapp">
        <div class="leftside">
             Touchscreen and mouse support HTML5 canvas sketchpad.<br/><br/>
             Draw something by tapping or dragging.<br/><br/>
             Works on iOS, Android and desktop/laptop touchscreens using Chrome/Firefox/Safari.<br/><br/>
             <input type="submit" value="Clear Sketchpad" id="clearbutton" onclick="clearCanvas(canvas,ctx);">
        </div>
        <div class="rightside">
            <canvas id="sketchpad" height="300" width="400">
            </canvas>
        </div>
    </div>
</body>
</html>
Touchscreen browsers try to emulate mouse events
It’s worth clarifying an additional point at this stage – in order to try to get maximum compatibility with existing websites and their mouse event handling, browsers on touchscreen devices such as Mobile Safari will try their best to emulate a mouse when you tap on any page element that is responsive to mouse events, such as a link, or a div or canvas listening for mousedown, mouseup etc.
So unless we prevent this behaviour, we might get a double-acknowledgement when tapping on the sketchpad for example – the first event trigger will be a touchstart, followed shortly after by a mousedown.
To stop this happening, we simply use the preventDefault() call when we’re finished with our touchstart, in order to stop any further events from being triggered due to that specific touch action.
You might run into some bugs with this on older Android browsers, however, especially if you’re also using more complex interactions with touchend, so it may be worth fully testing this behaviour on a touchscreen device.
Also, only use preventDefault() in this context when you’re sure that you have completed whatever the action the user wanted.
If you listened for touchstart on the entire document page for example, and issued a preventDefault() regardless of where/what the user touched, you may find that they are no longer able to tap on links on the page, since you’ve stopped the further issuing of the “emulated” mousedown or mouseclick on the link.
So just use preventDefault() when you’re sure that you’ve covered all the potential user interaction within the touch events associated with that element.
Supported browsers/devices
The HTML 5 canvas element works in all modern browsers, including mobile/tablet. With Internet Explorer, it’s supported from version 9 upwards. The touch events (touchstart, touchmove..) work on all mobile/tablet browsers. The situation with desktop browsers is a little more involved.
IE has an alternative system called Pointer Events that is supported from IE 10 upwards. The problem here is that other browsers have yet to add support, but it’s expected to happen throughout 2014 and onward.
Firefox supports touch events, but due to a bug filed in bugzilla, they have been turned off by default in the past few releases. They can be re-enabled in the browser. Further details are here.
It’s still worth using the Touch events version now however, since it supports all current and legacy Android and iPad users for example, as well as Chromebook and other touchscreen users on desktops/laptops.
As more non-mobile users become touchscreen enabled, pressure will undoubtedly grow on browser developers to get everything working smoothly on the desktop too.
2018 update – Although most desktops browsers now support Pointer Events, mobile and especially iOS support is not there – see current browser support for more details.
Upgrades
Once you’ve got to grips with the basic framework for the sketchpad, it’s easy to add features!
Change the pen size
Replace every instance of “12” in called to the DrawDot() function with a variable of your own.
You can then add images or buttons to the page which change the value of this variable when clicked.
Change the colours or add a background
Following the same method as changing the pen size, simply modify DrawDot() to use your own RGBA (red,green,blue,alpha/opacity) values.
Change these values based on some interaction with an on-screen widget (or use a counter to give a funky rainbow effect?).
To add a background image to the canvas, simply add a “background-image:” line to the CSS code for the canvas (our example canvas is called #sketchpad)
Update:
Here’s an example of a Sketchpad with a background image and a counter for changing the hue of the pen. Instead of using the RGB colour scheme when drawing the dot, we’re now using HSL which makes it much easier to change the hue.
Check out the HSL Calculator here for a visual representation of what the different H,S and L values mean.
…and here’s a link to the background image …have fun!
Draw connected lines instead of dots
You might have noticed that if you move the mouse or touch position too fast, the rendering can’t keep up and you get some spaces between dots.
An alternative is to create a DrawLine function, similar to DrawDot, except that it keeps track of the last x,y position as well as the current one.
Now instead of using ctx.arc to draw a circle, use ctx.moveTo to position the start of the line at the old co-ordinates, then ctx.lineTo to draw the line to the new (current) co-ordinates (example here).
This changes the look and feel of the sketchpad, so it may or may not be an improvement on the “dot” method.
Update: Here is a working example of the sketchpad using lines (source code is here).
Note that we’ve added lastX and lastY variables, and set them to -1 at the start. These will be our starting positions when we draw a line, but since we don’t know where the first line will start from, we will use the -1 value to indicate that the current position is invalid, or unknown. There is no special significance to using -1, it could be any other co-ordinate value that won’t appear in normal use.
At the start of our new DrawLine function, we check if lastX is invalid (set to -1).
This will be the case the first time a line is drawn, or if the “pen” (mouse or finger) is not touching the canvas. If so, we will just set lastX and lastY to the current position, then the next time we call drawLine, we will be able to correctly draw a line with two valid sets of co-ordinates.
This introduces a slight bit of added complexity, since we need to invalidate the lastX and lastY co-ordinates any time the pen is lifted from the canvas. Otherwise, we would continue drawing a line from the last position, even when someone has lifted the “pen” and decided to draw in a different part of the canvas.
The solution is simply to set lastX and lastY to -1 in the mouseUp function, and also in a new touchEnd function:
function sketchpad_mouseUp() {
    mouseDown=0;

    // Reset lastX and lastY to -1 to indicate that they are now invalid, since we have lifted the "pen"
    lastX=-1;
    lastY=-1;
}

function sketchpad_touchEnd() {
    // Reset lastX and lastY to -1 to indicate that they are now invalid, since we have lifted the "pen"
    lastX=-1;
    lastY=-1;
}
…and also add the new touchEnd event listener to our init() function:
canvas.addEventListener('touchend', sketchpad_touchEnd, false);Line style
One final point we need to look at when drawing lines is setting the line “cap” style. This is simply how the end of the line looks like, but if it’s not changed from the default setting of “butt”, the lines can look disjointed when drawing, since not enough pixels are drawn to connect adjacent lines at different angles.
We can do this in the drawLine() function as follows:
ctx.lineCap = "round";You can try commenting out this line to see what happens without it. You can also use “ctx.lineJoin” to change how it looks when two lines join, but it’s not relevant to our sketchpad since we are only drawing a single line each time between two co-ordinates, instead of a group of lines at once.
Want to let users submit their pictures after drawing them?
Try using the canvas toDataURL() function. This will convert the entire canvas area into a base64 encoded .PNG image.
You can then use this data in a hidden form field with a submit button to post the encoded image to your server. You’ll also need to strip out some of the extraneous formatting and convert back from base64 to a binary image on the server side.
Check out the answer here using PHP by user568021.
Also see the image saving demo code below, which implements most of the steps to get the image on to the server – you would just need to modify the PHP script to save it (using e.g. the PHP function file_put_contents() ) instead of sending it back to the user.
I just want to save the Sketchpad as an image?
This is surprisingly a little more difficult than it first appears. There are a few different ways of saving the sketchpad, but they all start with converting the sketchpad data to an image format such as PNG first.
The difficulty is in sending this image to the browser as a download. If you’re OK about first sending the image to a script on a server, then this is the best way for the end-user (apart from a small delay while uploading and downloading the image.
Here is a demo page, and here is the HTML source.
Here is the source for the PHP script (“save-image.php”) we will use.
This is what happens:
- A “Save Image” button is added to the Sketchpad page. This button is part of a HTML form.
- When clicked, a function is called, let’s call it saveImageRemote().
- This function converts the canvas data into an image (PNG) format using “toDataURL”.
- The image data is added to a hidden variable in the form (“save_remote_data”) and the form is submitted.
- A PHP script receives the form data, and converts it into a binary image. Before sending the image back to the browser, it adds Content headers to specify that it’s a downloadable file.
- The browser receives the data back from the script and starts downloading the image.
Why do we have to go through the strange steps of uploading the image to a server just to immediately download it again?
It’s because we can’t easily force the browser to accept an image download, unless that download comes from a remote server.
There are ways of forcing the image data into the current browser page (for example, using “window.location.href=image” in the answers here), however it doesn’t work very well – there is no .PNG file extension added, and the end-user can’t simply click on the file to open it.
By sending our image data to a remote script, we can add the content headers that tell the browser that it should download the file, and specify other data such as filename and filetype. The disadvantage of this approach is that it doesn’t work offline, and there may be a slight delay in uploading/downloading for large sketchpad images.
Note that iOS / Mobile Safari won’t process image downloads at all – they simply display within the browser, and the end-user has to long-tap to save them regardless.
I need to be able to save it offline
Looking at the previous example, we can also add a “View Image” button which displays the Sketchpad as a plain image in a new browser tab.
Alternatively, you can provide a thumbnail image of the sketchpad that updates every time the mouseup or touchend events are triggered. We do this in the example above using the “updateImageLocal()” function.
The user can then long tap or right-click on this thumbnail to save the image (the image will be saved as the full size version).
I would like to have more than one Sketchpad on the screen
There are a number of ways of doing this. One way is to create separate Javascript objects for each sketchpad (along with addition HTML canvas elements). It’s more complicated, but doesn’t require much extra code. We will need to get rid of the global canvas and ctx variables since they only allow for a single canvas and canvas context to be defined.
We will need to move these into a new ‘sketchpad()‘ function. We will also need to move the event handlers in here.
Check out a working example here, and adjusted source code here.
In our new init() function, we’re creating one or more sketchpads using our new sketchpad() function. This will mean that each separate sketchpad gets it’s own canvas and context variables.
To make this work properly, we need to preface any variables and functions that need to be kept local to either sketch1 or sketch2 (in our example), with “this.“.
“this” is simply a reference to either sketch1 or sketch2. When we create sketch1 with the line sketch1 = new sketchpad(‘sketchpad1’) then any reference to “this” is equivalent to referencing the sketch1 object. When we create sketch2, “this” is a reference to sketch2.
This means that each set of context and canvas values don’t get shared or mixed up between sketch1 and sketch2.
The last modification needed is to add “.bind(this)” when we’re adding our event listeners. This ensures that the functions that are called when the event triggers, also use the correct value of “this“.
In other words, when we refer to “this.ctx” in the drawDot() line in sketchpad_touchStart(), it should use the same value of “this” as in the main “sketchpad()” function, and therefore refer to the correct canvas context.
The “.bind(this)” is used because when an event is triggered, we don’t normally easily have access to whatever the value of “this” is between where the event handler was added, and the function that gets called when it triggers. See here for more details. Bind is a relatively new addition to Javascript that is available in IE9 and any new browsers.
We can also now easily clear a specific canvas by simply using “sketch1.clearCanvas();” for example. Since it’s simply a normal function and not a browser event, we don’t need to deal with the bind keyword.
The canvas sketchpad should give you a good basis for understanding interactions between mouse events, touchscreen events and the canvas element, even if you decide to use an alternative framework later.
Did you find it useful or informative?
Were you able to use some of the ideas in projects of your own?
Let us know in the comments section below.
Hi there
Thank you for a wonderful tutorial. I’ve added brush sizes, color options and an integrated image on the canvas for my website, so that users can color online. However, I need to install a back button as well – how do you suggest I do this:- my thoughts 1. Array of points pushed into JS array or via Ajax to php database?
2. Array of image as it develops in JS?
Could you give me your suggestions
Here’s my integration https://itsostylish.com
You can color any of the single pictures, not the paint by numbers or PDFs, obviously
Dear Sir
Can this code also be used for apple pencil?
Hello, I get the some stuck. Can you please check my app.
I can draw perfect on desktop and chrome simulator on desktop and main browser of android. But I can’s draw correct on android chrome. It seem i get incorrect coordinate on touch
My app: https://zcolorqa.azurewebsites.net/
Many thanks
Zipso, thanks for this tutorial you saved my life :).
Anyway I have a question, when I define height and weight in the html file, all works as it should, but when I define it in the css file as height=300px and weight=500px, it starts to draw the lines far from the mouse position. Any idea why?
Again thanks for this tutorial. 🙂
https://stackoverflow.com/questions/34577591/javascript-canvas-drawing-at-wrong-coordinates
don’t define from css, instead manual from html
Thank you sir, it was very helpful for me 🙂
Hi Sir, This was a helpful tutorial. I have a question. I’m using this sketchpad in java based application using spring mvc. I would like to save the sketch pad as an image into the DB. Could you please help me in on this issue.
Sorry I’m not familiar with using Spring MVC, however, if you have a method to save the results of a standard HTML form to the DB, then you should be able to adapt it to save the image. If you look at the example in the post under the heading “I just want to save the Sketchpad as an image?”, the image data is simply submitted in a form field called “save_remote_data”.
hi Sir,
Can you add option to undo and redo? thanks
Thanks for this!
Is there a way to make the canvas relative to the screensize? When I try to do this using ‘100vh’ for the height of the canvas or #sketchpad, the entire canvas stretches out including the dot etc getting bigger.
I think you can only really set the canvas dimensions in pixels without distorting things. So this is a problem when you don’t know the width/height of the screen/window.
You probably need to use some small Javascript to get the current window pixel dimensions, and then use that to adjust the canvas size.
Here’s an example: https://zipso.net/sketchpad/sketchpad-touch-full.html
I’ve got rid of the canvas width and height values in the css and html part – instead there is some new code in init(). This calls sketchpad_resize() which will set the canvas width and height (as a percentage, 75% and 92% in this case but you can change it to whatever you like) when the page loads.
We might also want to add an event listener to do the same thing when the browser window is resized: window.addEventListener(‘resize’, sketchpad_resize, false);
One complication with this however is that the canvas content clears whenever the width or height changes.
Not a problem when the page first loads, but it will definitely be a problem if the window is resized. The answer provided by “braitsch” here should work:
https://stackoverflow.com/questions/5517783/preventing-canvas-clear-when-resizing-window
This involves creating a temporary canvas and using it to save a copy of the ‘real’ canvas contents, then resizing the ‘real’ canvas and copying back the saved contents (this could be adapted for use within the sketchpad_resize() function).
You might need to figure out exactly what you want to do in such a case, e.g. whether you want to try to scale the old canvas contents proportionately into the new canvas size.
If you only need to set the canvas size at page load time then it’s easier to just ignore all this stuff and not use the event listener above, and just call sketchpad_resize() once in init().
Fantastic article, thorough, interesting, useful. Thanks for sharing!
I have this working when just placed on an HTML page, but when I have it within a jQuery UI Dialog (https://jqueryui.com/dialog/) it breaks on mobile. It will show an existing image, but I can’t draw anything new. It works fine on the desktop but not on mobile. It’s like the touch isn’t being recognized. Running Chrome in mobile dev mode replicates the issue. Any idea what can be done to fix this?
Thanks
Do you have a test page with the non-working example you could share the URL of?
How to change circle line to like pencil.
If we draw speedly then diagram create with dotted space.
I want to create line pencil without space
This is covered in the article under the heading “Draw connected lines instead of dots”
It’s work for me.
Great work thank you
Hi,
It was really helpful. However, I could not set the canvas ready to use after every Clear button click. On page load I was able to sign the canvas digitally but after clearing the canvas, I was not able to sign again. I tried calling init function from clearCanvas but that did not help. I tried calling init on the Onclick event of Canvas. That worked but the user has to click before actually start signing. So that does not work as expected. Please suggest.
Are you trying this on mobile? Android or iOS?
Very nice! There’s a bug in the PHP script, on this line:
header(“Content-Length: ” .(string)(filesize($file)) );
$file is never defined, so filesize returns 0, which results in 0 for Content-Length, which yields (at least in Chrome on the Mac) an empty file. Just leave this line out. Modern browsers can infer the length.
Thanks
Hi,
Thank you for this great code!
It’s working wonderfull on desktop and few android tablets.
However, I have some problem.
Canvas is located in scrollable div,canvas height is 1000px, and div height is 500px.
When I scroll div all the way down, on desktop pc (with mouse) everything works fine, however on android (touch) canvas offset is off.
I can do something like this touchY=touch.pageY-touch.target.offsetTop+500; , but then again everything will be off for the “first” 500px.
Whats the solution for this?
Thank you.
One more thing, how can I use (and save to png) more then one canvas at the same page?
Thank you!
At the end of the article, there are some suggestions and an example on how to use more than one canvas in the section “I would like to have more than one Sketchpad on the screen”.
In the example code for saving a PNG from a single canvas, you can see the HTML code for the action taken when saving an image is within this form:
<form name='save_remote' id='save_remote' method='POST' action='/sketchpad/save-image.php' onsubmit='saveImageRemote(canvas); return false;'><input type="submit" value="Save Image" id="save_button">
<input type="hidden" name="save_remote_data" id="save_remote_data">
</form>
To change this to work with the two canvas code, it needs to be updated so that the submit mechanism of the form is removed from the form itself and moved to two separate submit buttons.
First remove the submit button from the inside of the form, so that the form now only contains the hidden data field which will hold sketchpad image data.
Also remove the ‘onsubmit’ handler from the form so that it looks like this:
<form name='save_remote' id='save_remote' method='POST' action='/sketchpad/save-image.php'><input type="hidden" name="save_remote_data" id="save_remote_data">
</form>
The ‘onsubmit’ handler is removed, because we will call the ‘saveImageRemote()’ from each individual submit button instead.
Now the submit buttons can be added simply like this:
<input type="submit" value="Save Image" onclick="sketch1.saveImageRemote();">..and for the next canvas,
<input type="submit" value="Save Image" onclick="sketch2.saveImageRemote();">You would then need to modify the saveImageRemote() function, by placing it within the function sketchpad(my_sketchpad) section, something like this:
this.saveImageRemote = function() {var image_data = this.canvas.toDataURL("image/png");
document.getElementById('save_remote_data').value = image_data; // Place the image data in to the form
document.forms["save_remote"].submit(); // Submit the form to the server
}
Note that both Save buttons are using the same one form, and just replacing the contents of the “save_remote_data” field with their own canvas data when the button is pressed. By doing this, it means that you don’t have to worry about figuring out which form to use in the saveImageRemote() function.
Excellent code.
I am trying to create a button to save the canvas, but it is not clear. Can you give me a hand?
Thank you very much
Did you look at the section in the article titled “I just want to save the Sketchpad as an image”?
Have you tried this in a different browser on Android, e.g. Firefox?
It might be something related to this:
https://stackoverflow.com/questions/26723382/android-device-recording-wrong-pagex-pagey-when-scrolled-in-chrome-browser
Just figured out this morning that you provided example for multiple canvases – so this is solved, everything works great.
Regarding touch offset on scroll, I will check this link. I’m kinda limited to Chrome since I’m using it as a standalone app (web app).
Thank you so much for your effort!
Cool 🙂
I just updated the previous reply since I realised it wasn’t going to work properly…
About the touch offset problem, if it works on some version of Chrome or stock Android browser, perhaps check the version number to see if it’s a problem maybe with some older versions of the browser.
It could be worth checking in Firefox also just to confirm if it is something browser specific, even if the app won’t use Firefox eventually.
Ok, I did try in firefox (android) but offset problem persist.
Even as a “bonus” when you draw on the sketchpad, it seems that prevent_default is not working, since div scrolls at Y axis, which is not the case in Chrome.
So I will stick with Chrome, but still need to find out the way to fix that offset problem.
Any idea? I wasn’t able to troubleshoot it with the link you posted.
Thanks
Ok I think you can fix this by getting the scrollTop (and scrollLeft) values for the scrollable div.
I tried it in the examples above by changing the “rightside” div to an id and making it overflow:scroll, and increasing the height of the canvas so that it overflowed the div (and had a scrollable padding area).
Then changing the getTouchPos function to take account of the scrolling of this div seems to work:
scrollX=document.getElementById('rightside').scrollLeft;scrollY=document.getElementById('rightside').scrollTop;
touchX=touch.pageX-touch.target.offsetLeft+scrollX;
touchY=touch.pageY-touch.target.offsetTop+scrollY;
So of course, change ‘rightside’ to whatever the id of your scrollable div is.
btw. Chrome is the newest version on Android 8.1
Thank you so much for your help!
It works perfect after those scroll modifications.
btw. not sure if this is related to the this sketchpad, or canvas in general, but when I turn off display on the tablet, and after few minutes if I turn it on, sketchpad background disappears(becomes transparent).
I’m using this on clear button and on body onload:
sketch1.ctx.fillStyle = ‘white’;
sketch1.ctx.fillRect(0, 0, sketch1.canvas.width, sketch1.canvas.height);
So, I need to refresh the page or click clear button s I can get white non-transparent background.
Any idea why this happens?
Hi Good day!,
I find your post really good. Do you have any tutorials on how to create or draw arrows and insert text using php/html/js?
Thank you
This is so helpful. I am trying to translate my javascript apps to be touch friendly.
I am trying to create quadrilaterals by touching the canvas at the intended vertices. This needs a straight line to be created between each touch on the canvas thus joining the vertices.
I hope then to be able to move each of the vertices and thereby change the shape of the quad.
Hi Patrick,
Glad to hear it was helpful!
What kind of Javascript apps do you have?
Hi,
How do i save the canvas with the image background
Dear sir a very good work here i like to create eraser function sir but am not getting it rightly below is my code
function ctxerase() {
r=0; g=0; b=0; a=0;
var e = ctx.canvas[0];
//ctx.strokeStyle = “rgba(“+r+”,”+g+”,”+b+”,”+a+”)”;
ctx.strokeStyle = “#ffffff”;
ctx.lineWidth = 10;
//this.context.clearRect( 0, 0, c.width, c.height );
}
To make an eraser, you need to change the way new pixels are added to the canvas (‘compositing’).
The default is to overlay new pixels on to whatever is already there. This is ‘source-over’ mode – see here for details: https://www.w3schools.com/tags/canvas_globalcompositeoperation.asp
What you want to do is change the mode to ‘destination-out’ compositing mode if you want to make an eraser. This will change the canvas behaviour to remove whatever pixels are underneath when you draw on to it.
You can do something like this to changing the compositing mode at the start of drawDot, which can depend on an extra ‘eraser’ parameter:
function drawDot(ctx,x,y,size,eraser) {
if (eraser==true) {
ctx.globalCompositeOperation=”destination-out”;
} else {
ctx.globalCompositeOperation=”source-over”;
}
…
}
So now when you call drawDot, you can add a ‘true’ on to the end to make it an eraser, e.g.
drawDot(ctx,touchX,touchY,12,true);
Alternatively, probably a better way to do it is to just change the “ctx.globalCompositeOperation” value whenever you select an eraser button or icon, and then reset it when you go back to a normal pen, but the example above should give an idea of how to do it.
Hi sir, thank you very much for this updates but i like to ask is it not possible to add more canvas at the end of another canvas if need be and save all the writings as one and not individually just like we can have pages at end of document under Mirco-softword. thank you