
How to upgrade or replace the SSD drive in a Dell Chromebook 13
Follow our step-by-step guide to increase the storage space in your Dell Chromebook 13.
The Dell Chromebook 13 is one of the most popular Chromebooks currently on the market, due to its combination of FullHD IPS screen, high build quality, and fast processor options (see our Chromebook Comparison Chart for an extensive list of Chromebook specs & performance).
But like almost all other Chromebooks, local storage space is limited to either a 16GB or 32GB SSD storage option.
This is fine for most online usage, however sometimes you may want increased offline storage space for music or video collections, or especially if you’re running native Linux apps or games on your Chromebook.
Replacing the built-in storage on the Dell Chromebook 13 is straightforward – here we’ll show you the exact steps needed.
(Click on the images for hi-res versions)
Before you start
Here’s what you’ll need for this upgrade:
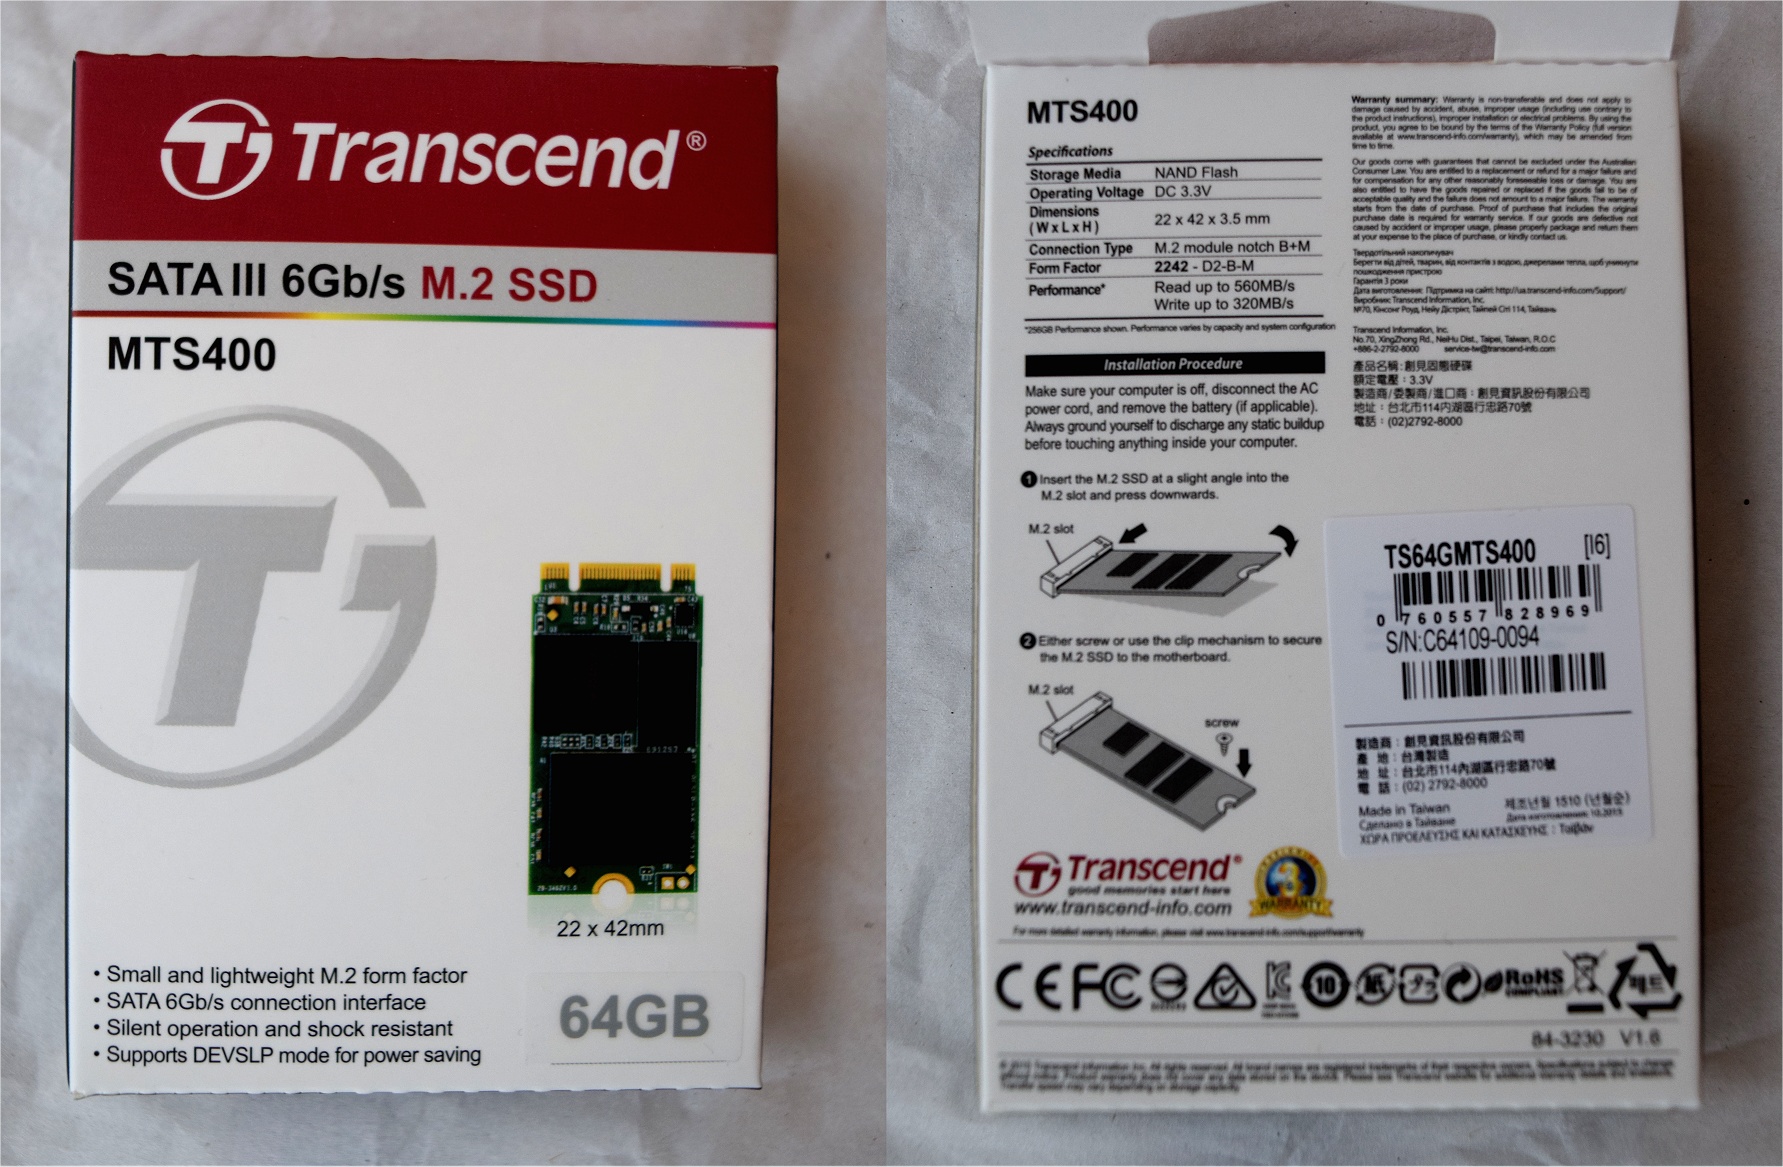
- A replacement SSD drive.
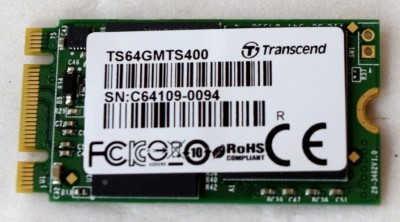
Any of these SSD drives should work fine (42mm M.2 NGFF).
Transcend, ZTC and MyDigital are popular brands. MyDigital had some issues with drives failing some time ago, however this appears to be less of a concern now.
Some people had also previously reported firmware problems with the power-saving feature on Transcend drives, however this no longer appears to be an issue with current versions of these drives.
For this example, we’ve used a 64GB Transcend SSD. - A 4GB or larger USB stick or SD card to act as a ChromeOS recovery disk.
- A couple of Phillips-style screwdrivers
- A small credit-card thickness piece of plastic to lever open the case
Step 1 – Create a ChromeOS recovery disk
You’ll need to first create a recovery disk to re-install ChromeOS on your new SSD drive.
Even if you plan on replacing ChromeOS entirely with a Linux distribution, it’s worth creating the recovery disk in case you run into problems with your new install at some later stage.
Use the Chromebook Recovery Utility to create your recovery disk. It comes as a Google Chrome extension and can be installed from the Chrome Web store at this page.
After installing, start the recovery utility from your normal Chrome Store app page, and follow the instructions. You’ll also need to supply your Chromebook’s serial number.
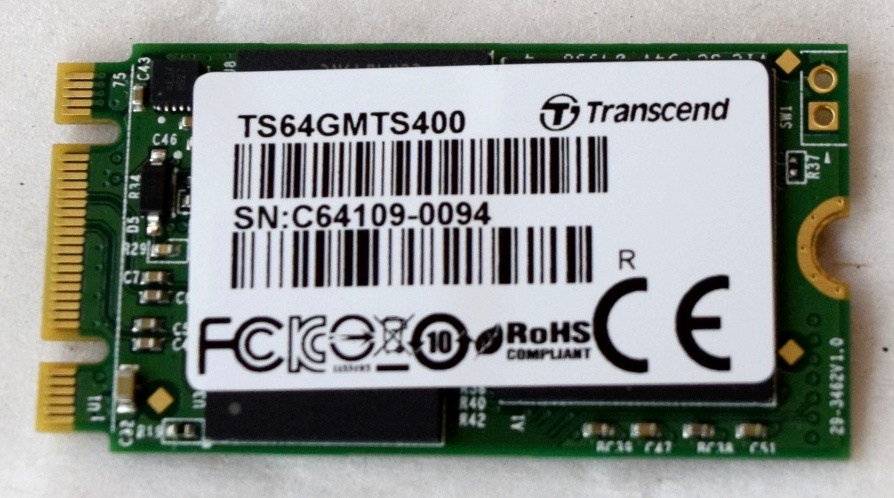
Step 2 – Remove the screws from the bottom cover of the Chromebook
The bottom plate of the Chromebook 13 contains 11 screws attaching it to the body. Unscrew these with an appropriate sized screwdriver.
Step 3 – Lever open and remove the bottom cover
There are no cables or other attachments connecting the cover with the rest of the body – it’s simply pushed into place.
You’ll need a thin piece of plastic card or something similar to help with physically removing the cover.
In the image below, we used a little plastic card to gradually separate the back cover from the rest of the Chromebook, starting at the top-left corner and working towards the right.
After some time, you should be able to easily lift off the entire cover. 
Step 4 – Remove the old SSD drive
Now that the back cover is off, you should be able to see the old SSD drive at the top right, just above the WiFi card (see marked image below).
The drive is kept in place with a single screw. Simply unscrew this and pull out the card.
You might also notice a warning on the battery – “Please disconnect and remove battery before accessing device”. It’s probably not entirely necessary to do this for the purpose of replacing the SSD drive, as long as you’re not poking around too much in the innards of the Chromebook.
We didn’t remove the battery in this example, however we’re not responsible for any damage that might happen in this case..!
Step 5 – * Optional * – Remove the BIOS write-protect screw
At the top-right of the board, there is a screw with the letter “WP” written beside it. This should be the Chromebook BIOS write-protect screw.
In earlier Chromebooks, you would need to remove this to install an alternative BIOS – for example, if you wanted to dual-boot into Linux as well as ChromeOS. However, on the newer Broadwell chipset Chromebooks (Dell Chromebook 13 included), you don’t need to do this to get dual boot – instead, you can just install the “Legacy” bios by running the script on the johnlewis.ie ROM download page.
With the write-protect screw in place, you are still prevented from modifying or skipping the “Developer mode” screen at boot time. If you remove the screw, you should be able to use the commands on the page here to effectively skip the developer screen at bootup.
Be a little careful if you’re going to try this though, since there is some more risk involved. We recommend getting a ChromeOS and Linux dual-boot fully working first before trying this.
If you just plan on keeping ChromeOS on your Chromebook and not dual-booting or installing another OS, then you can just ignore the above and keep the screw attached. 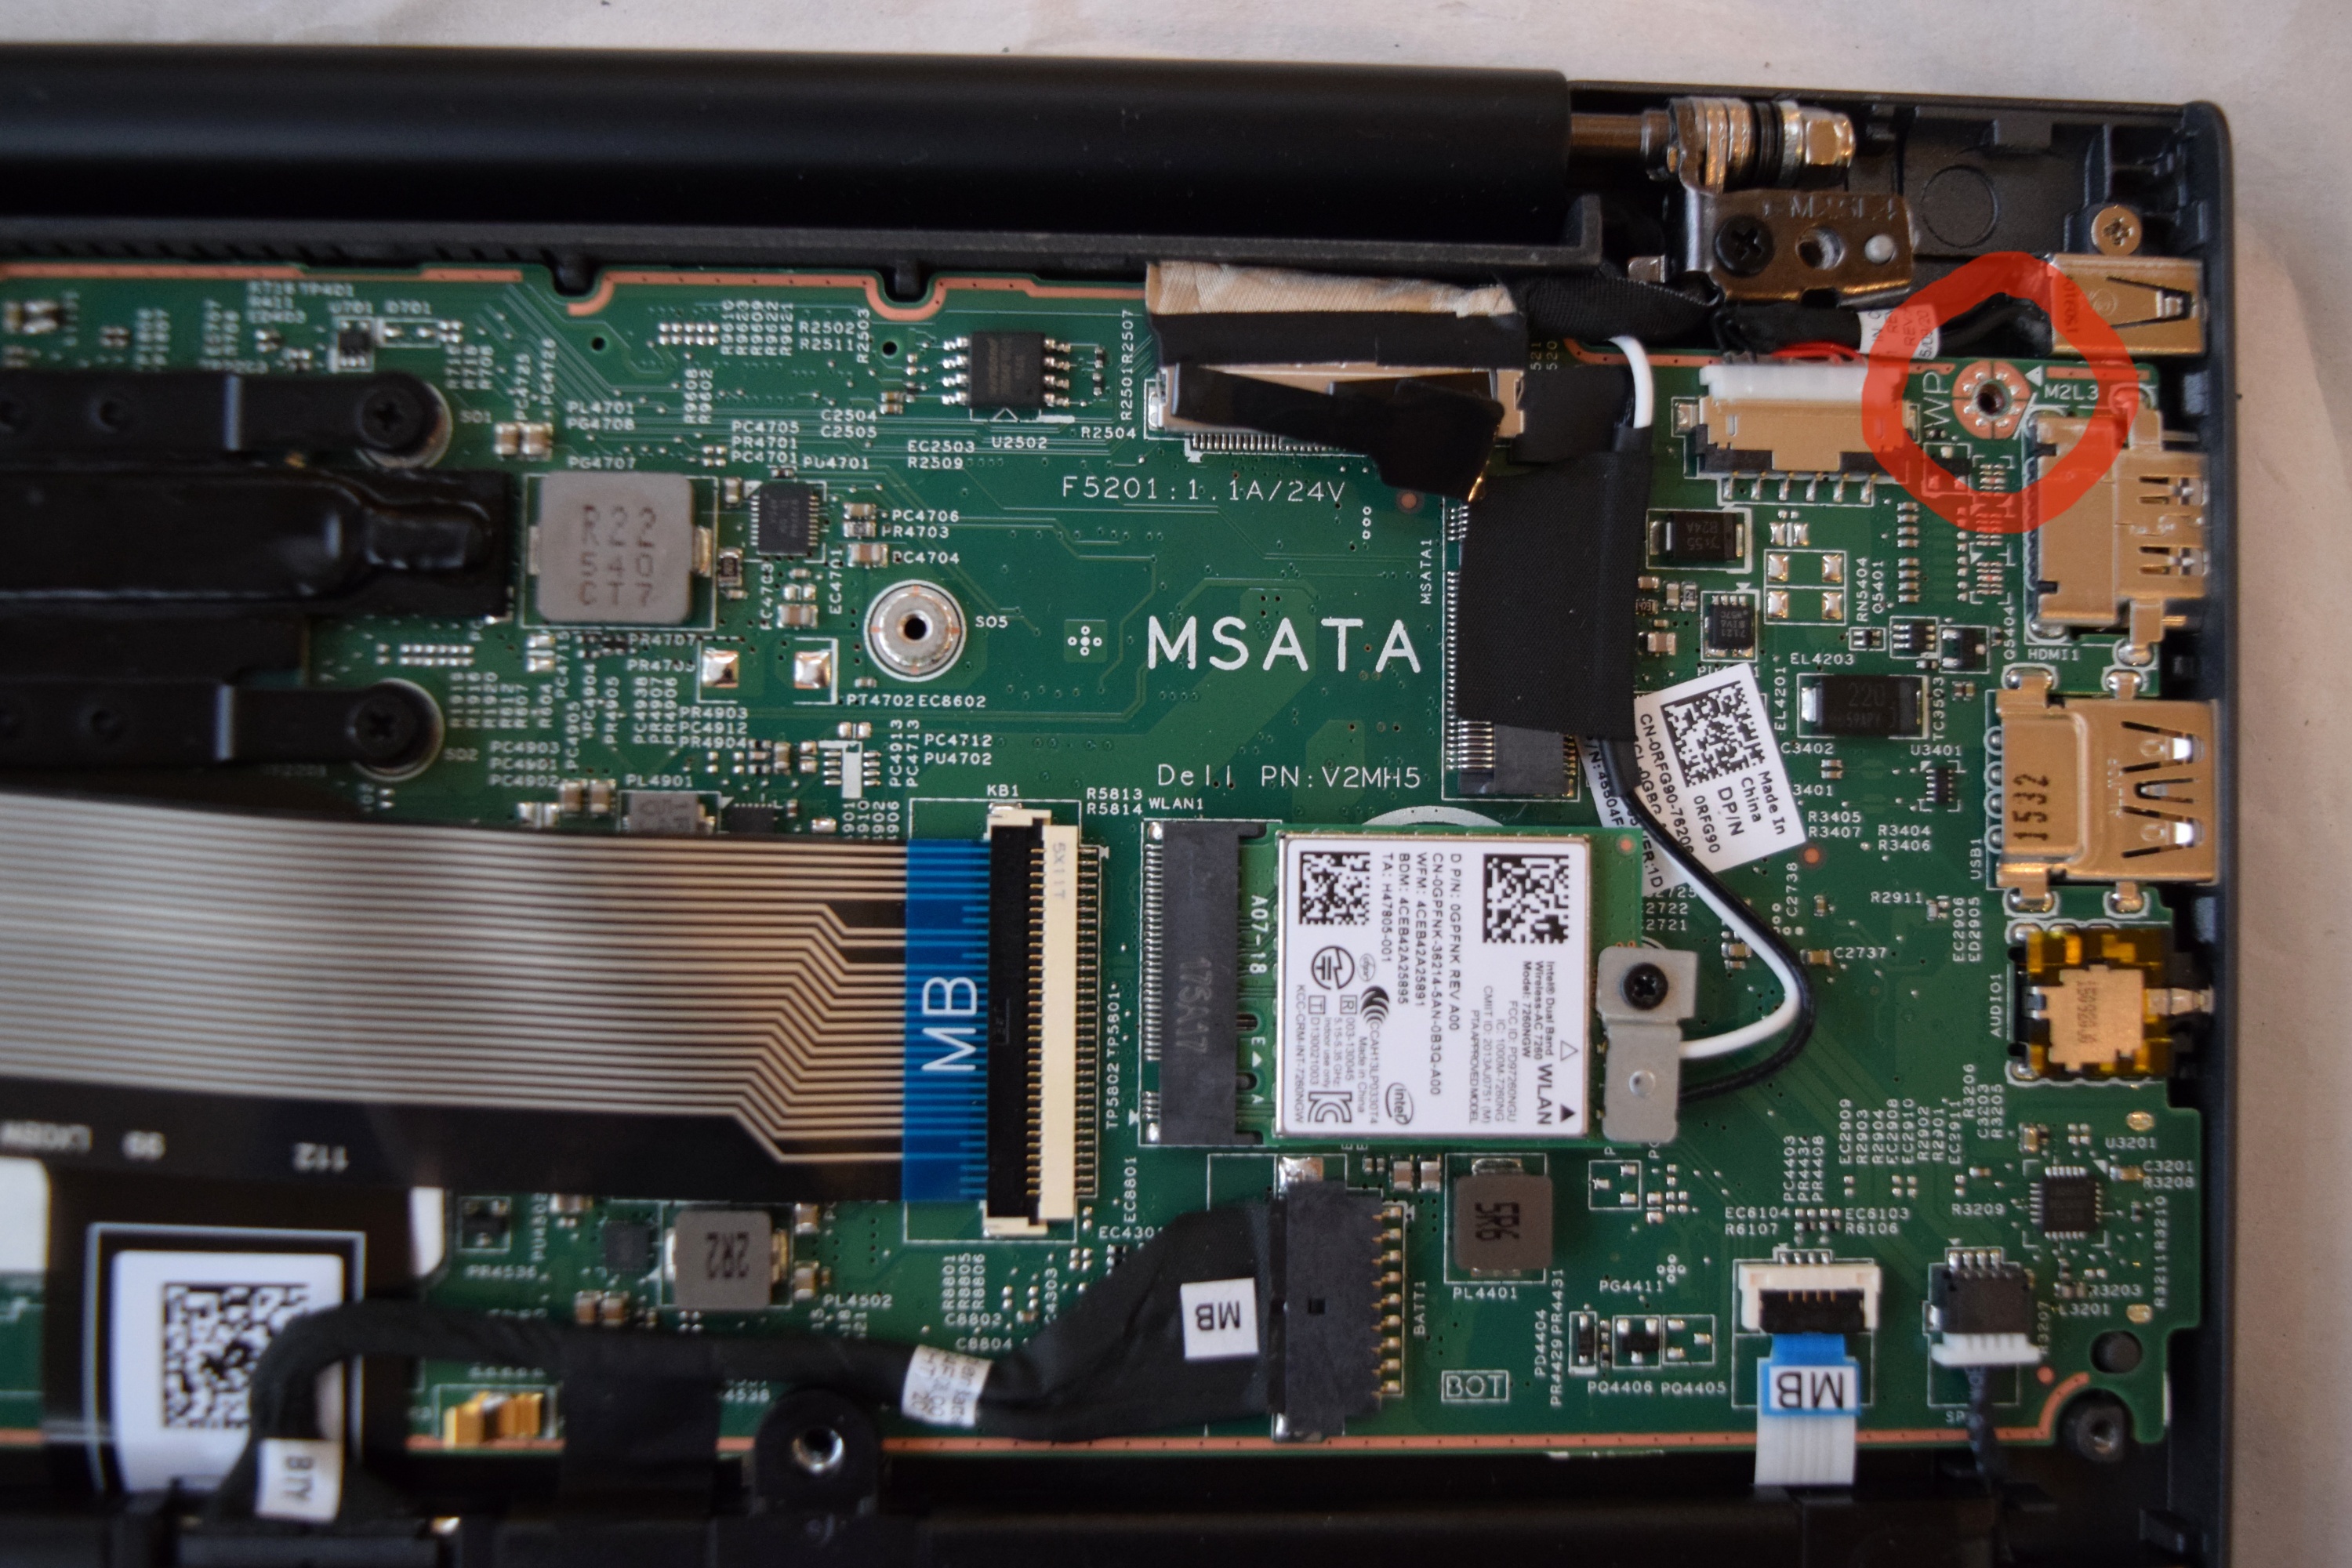
Step 6 – Insert the new SSD
Simply push the new SSD into the slot at an angle first, and then press down and attach it with the screw.
There should only be one way of inserting the card, it will probably be the side with the “CE” etc. markings on the label.
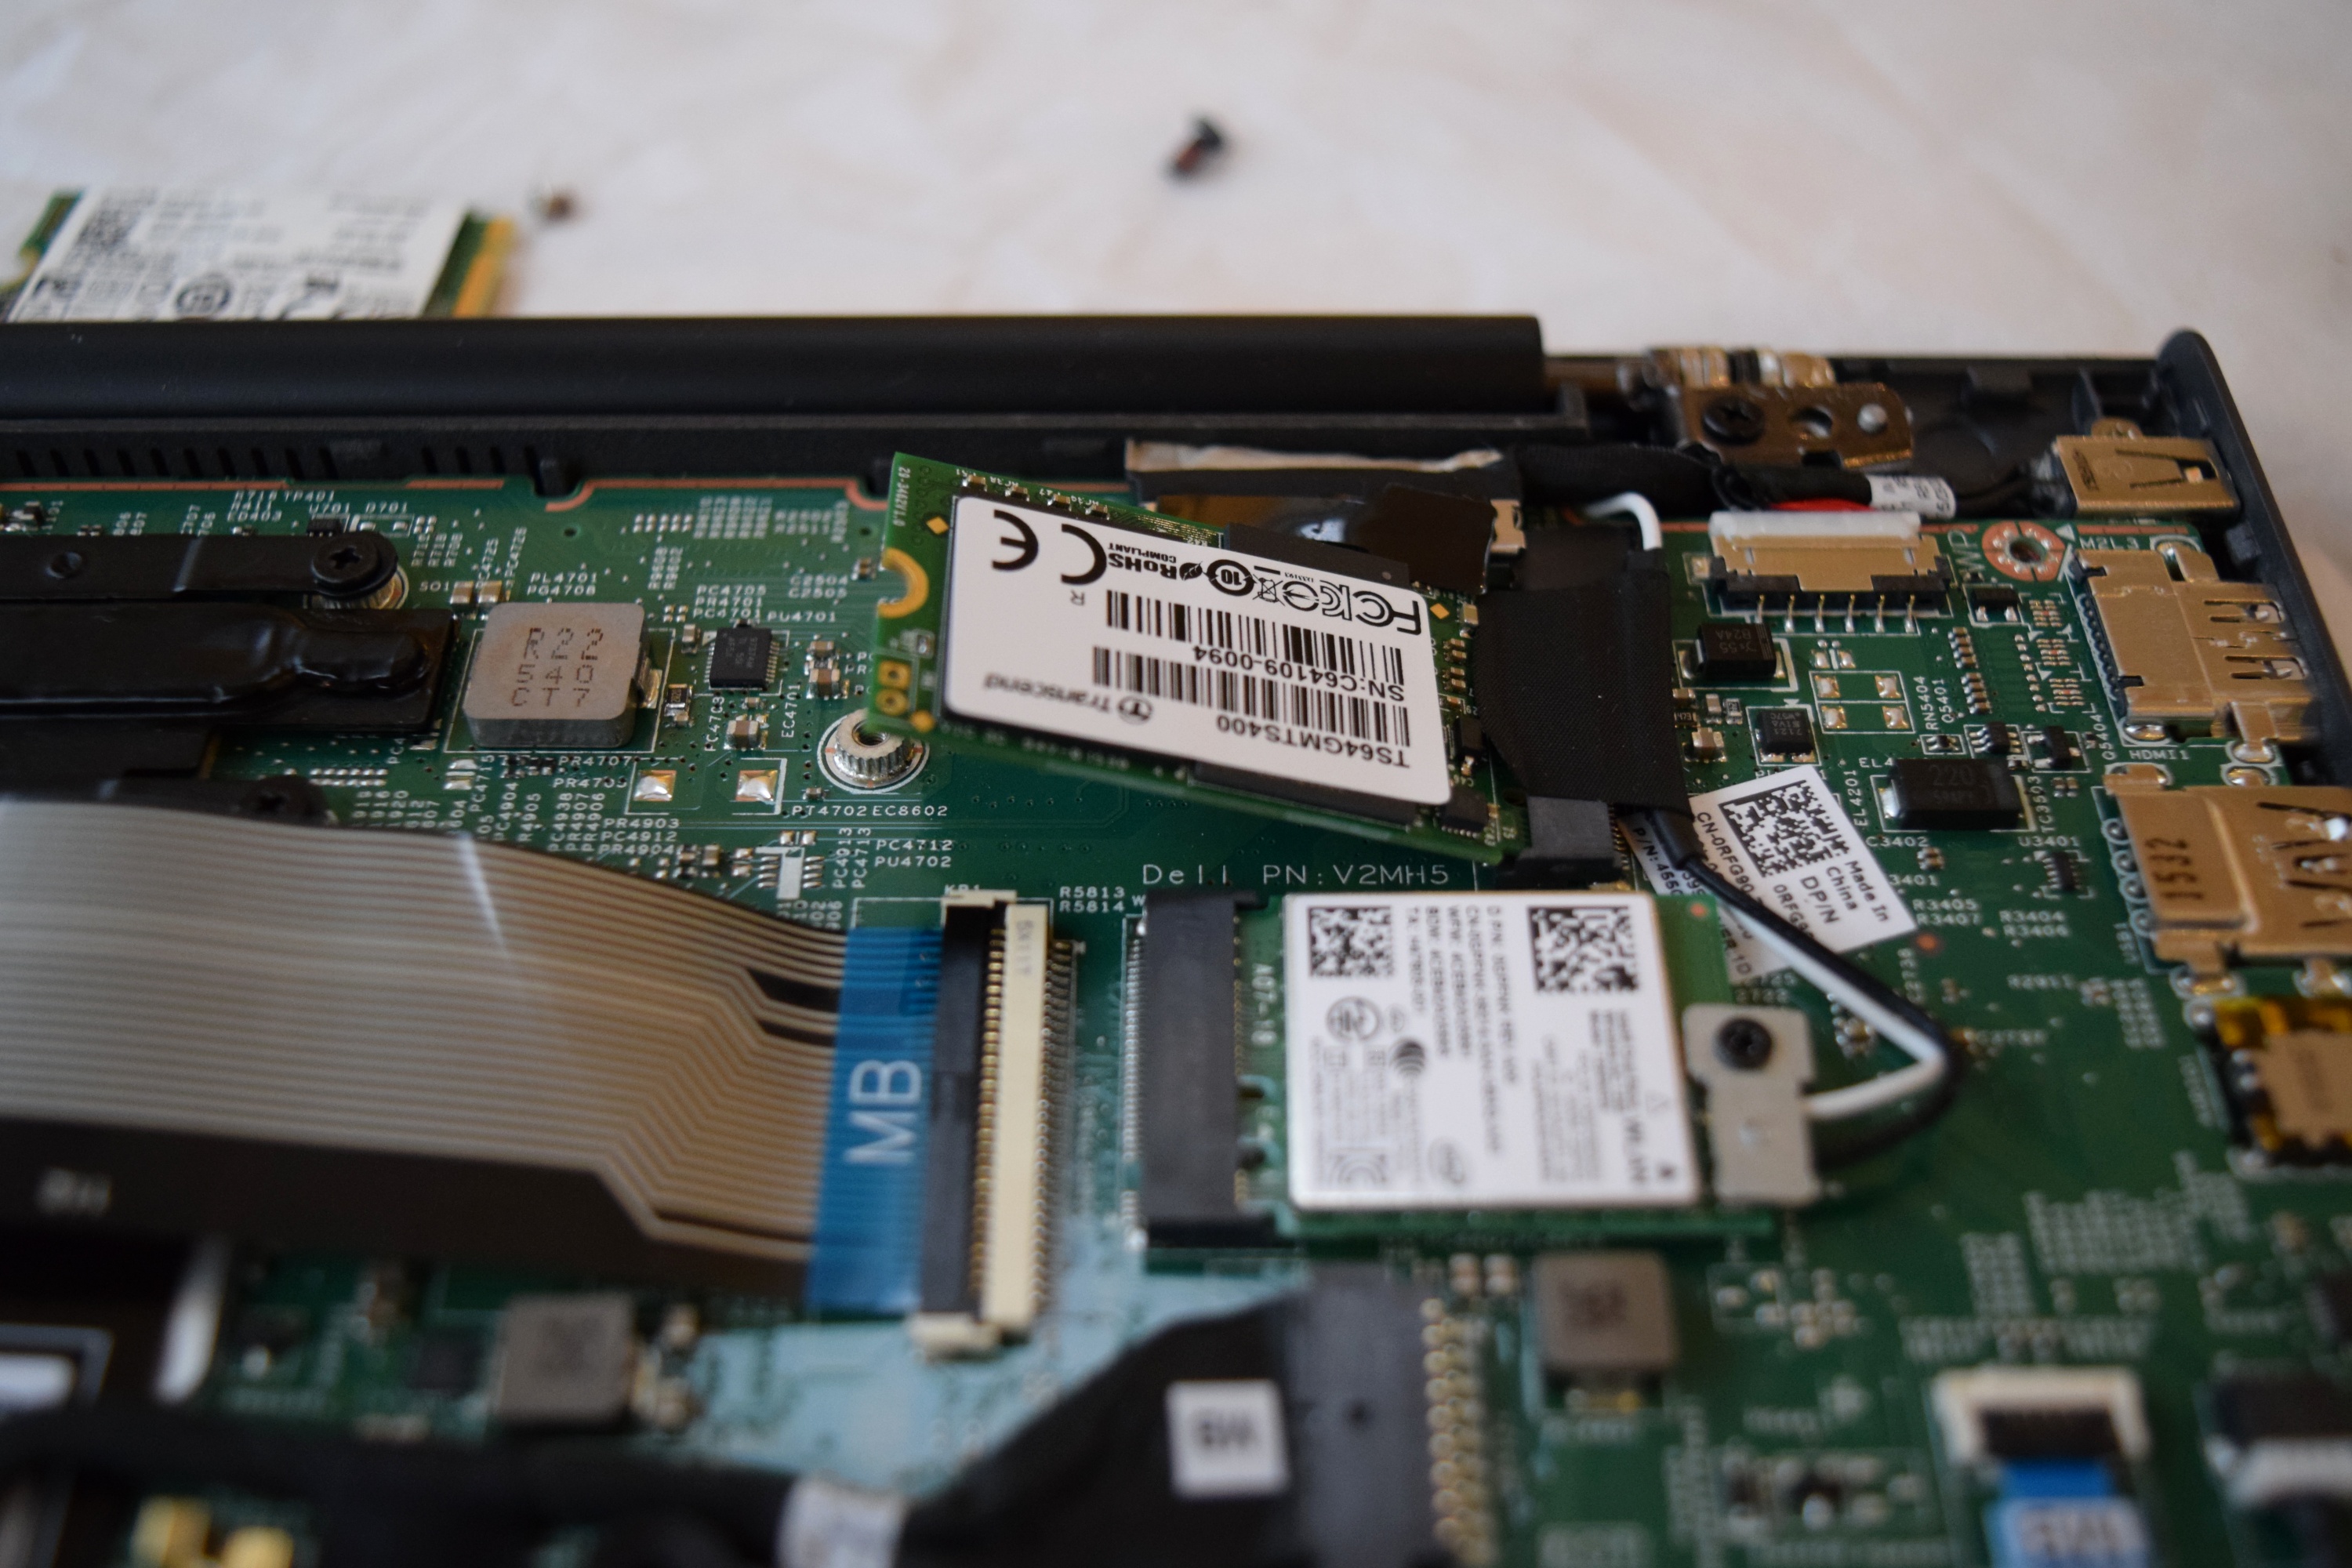
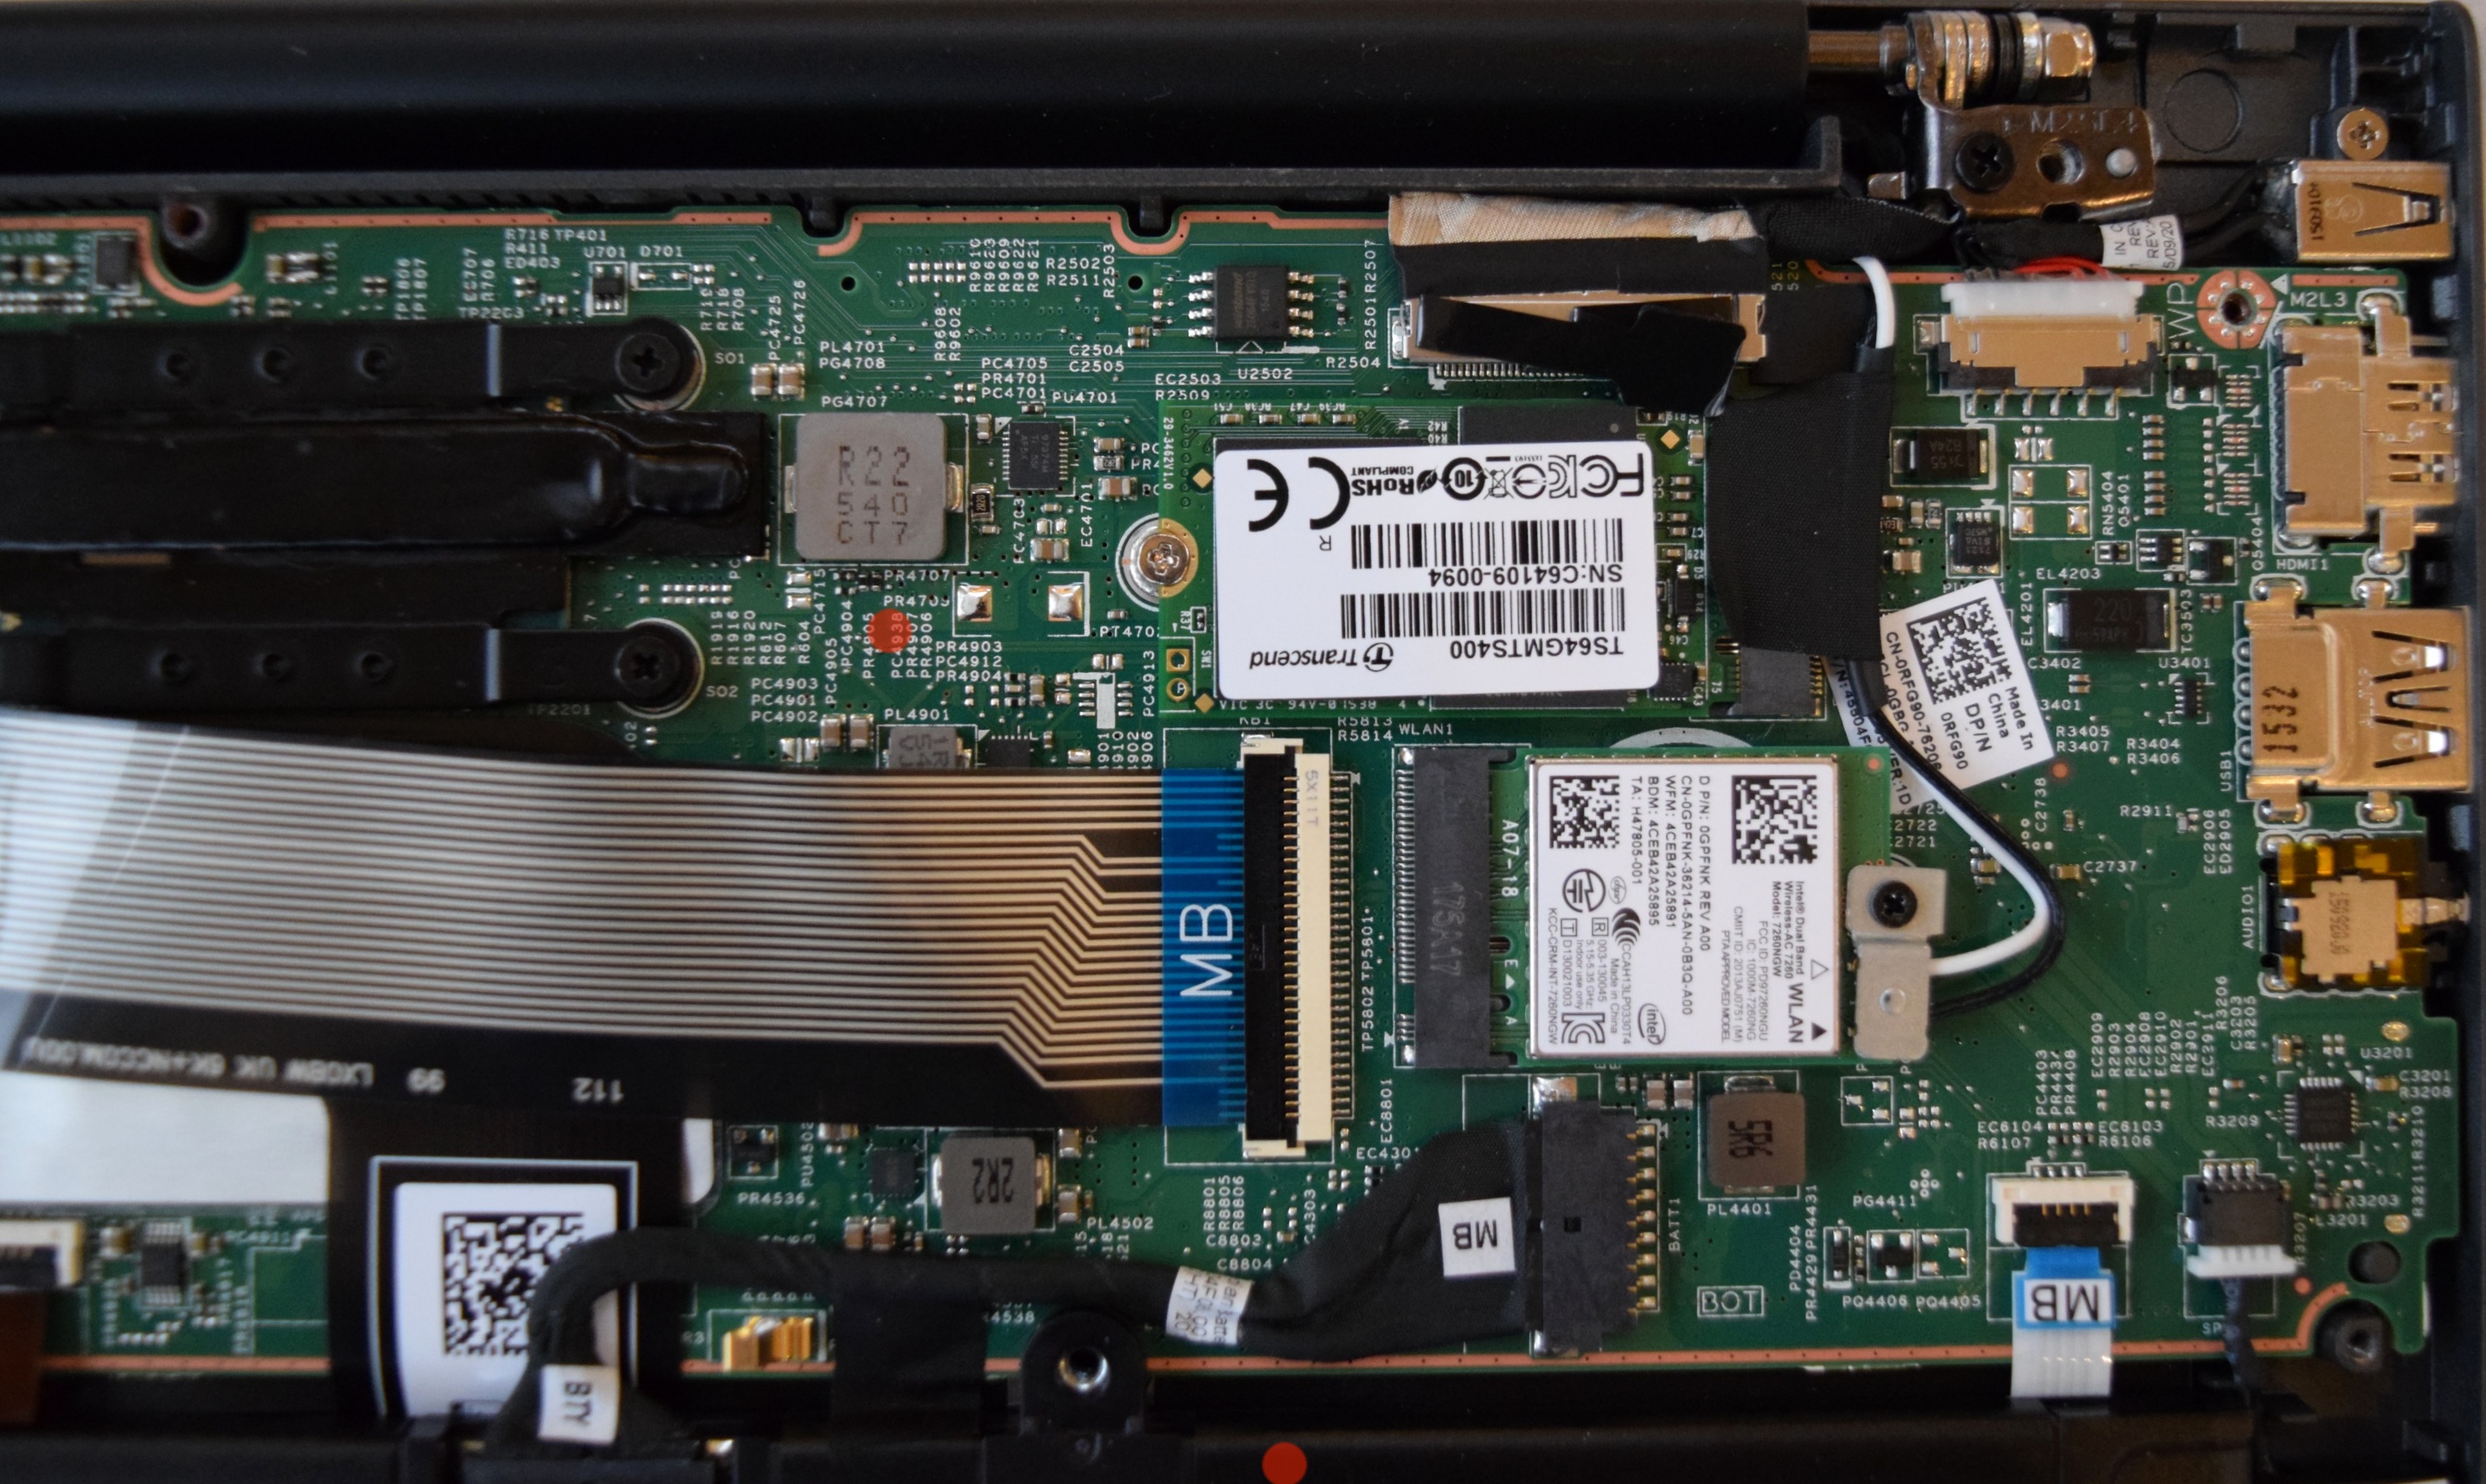
Once the new card is in, it should look something like this:
Step 7 – Replace the back cover
Re-attach the cover by first pressing it into place. You may need to check that the edges of the cover are pushed down and fit snugly into the body of the Chromebook.
Replace and screw in the 11 screws.
Step 8 – Power up and Install ChromeOS on your new drive
Your new drive is completely blank, so you’ll need to use the recovery disk you made earlier to re-install a fresh copy of ChromeOS on to it.
After powering up, a warning message appears:
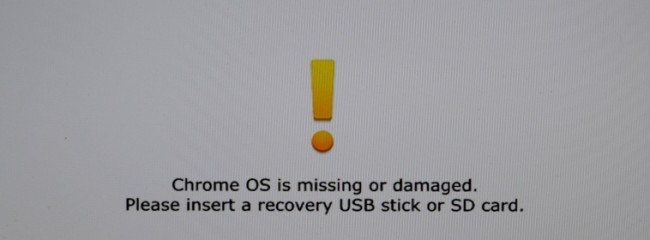
Insert your recovery disk and wait while ChromeOS is re-installed. When finished, it should display “System recovery is complete”.
You can now remove the recovery disk and the Chromebook should restart into the fresh install of ChromeOS.
Check the available space on your new disk in ChromeOS
Once you’ve logged into your new ChromeOS installation, you can go to the File Manager, select “Downloads” and click on the right-most menu option to see how much free space you now have:
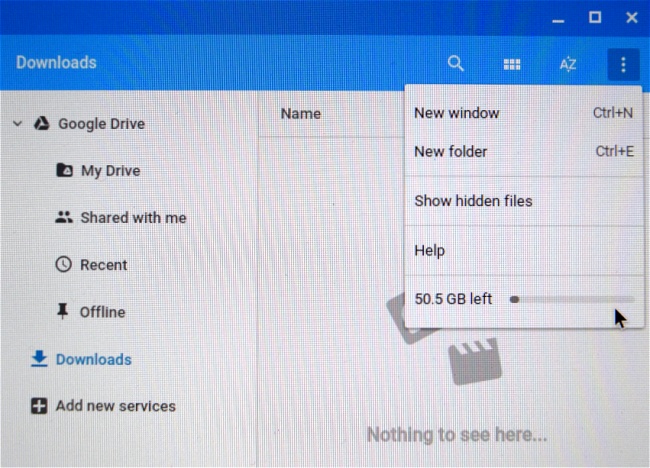
ChromeOS will take up approx 4GB – 5GB on what is probably about 55GB of usable space on a 64GB SSD, leaving just over 50GB free.
On a 128GB SSD, you should get something in the range of 105GB – 110GB free space after a fresh install.
More options
Now that you’ve increased the local storage on your Chromebook, it’s easy to either install Crouton to get a full Linux desktop side-by-side with ChromeOS, or re-partition and dual boot your new disk and install something like GalliumOS.
(The easiest way to do this is by following the chrx instructions from within a ChromeOS shell window (Ctrl-Alt-T). This will let you choose the size of your new partition, it will then set it up and do the GalliumOS install for you.)
Let us know in the comments if you’d like to see us cover either of these topics in a future post, or if you found this upgrade guide helpful.
For the moment, here’s some more pictures of the internals of the Dell Chromebook 13:


my dell not install new ssd ! loading end and write error
Great guide!
Just wanted to contribute something for future readers/Googlers:
I don’t know if the Dell Chromebook 13 has a max hard drive size limit but I replaced mine with a 256GB SSD and it worked perfectly.
I verified ChromeOS was fine with the big drive before using my extra space to dual boot Gallium.
Anyway, 256gb is great. A 500GB might work as well? Or 1TB?
¯\_(ツ)_/¯
Thanks for sharing! 🙂
Thank you and appreciated for such a nice article
If I want to wipe out Chrome OS and install a full linux,how can I do?
Thanks!
Best thing to do is probably follow the GalliumOS install instructions:
https://wiki.galliumos.org/Installing
…but make a ChromeOS recovery image first, it could help you if you get stuck somewhere with the Linux install:
https://chrome.google.com/webstore/detail/chromebook-recovery-utili/jndclpdbaamdhonoechobihbbiimdgai
Is there another Dell cb13 that doesn’t have an upgradable SSD? I opened mine up last night and doesn’t have the wifi card or SSD in the spot shown in your pics. It appears it doesn’t have one or is on the other side of the system board.
yes there is , a newer , less stylish one , this one is the 7310 Lulu device , yours is the 3380 , but it should have a replaceable ssd as well
Wait what? I’m looking at Lulu’s insides at the present and it’s got an ssd like yours. I might even argue they look identical except a wire connector i saw yours was different color…
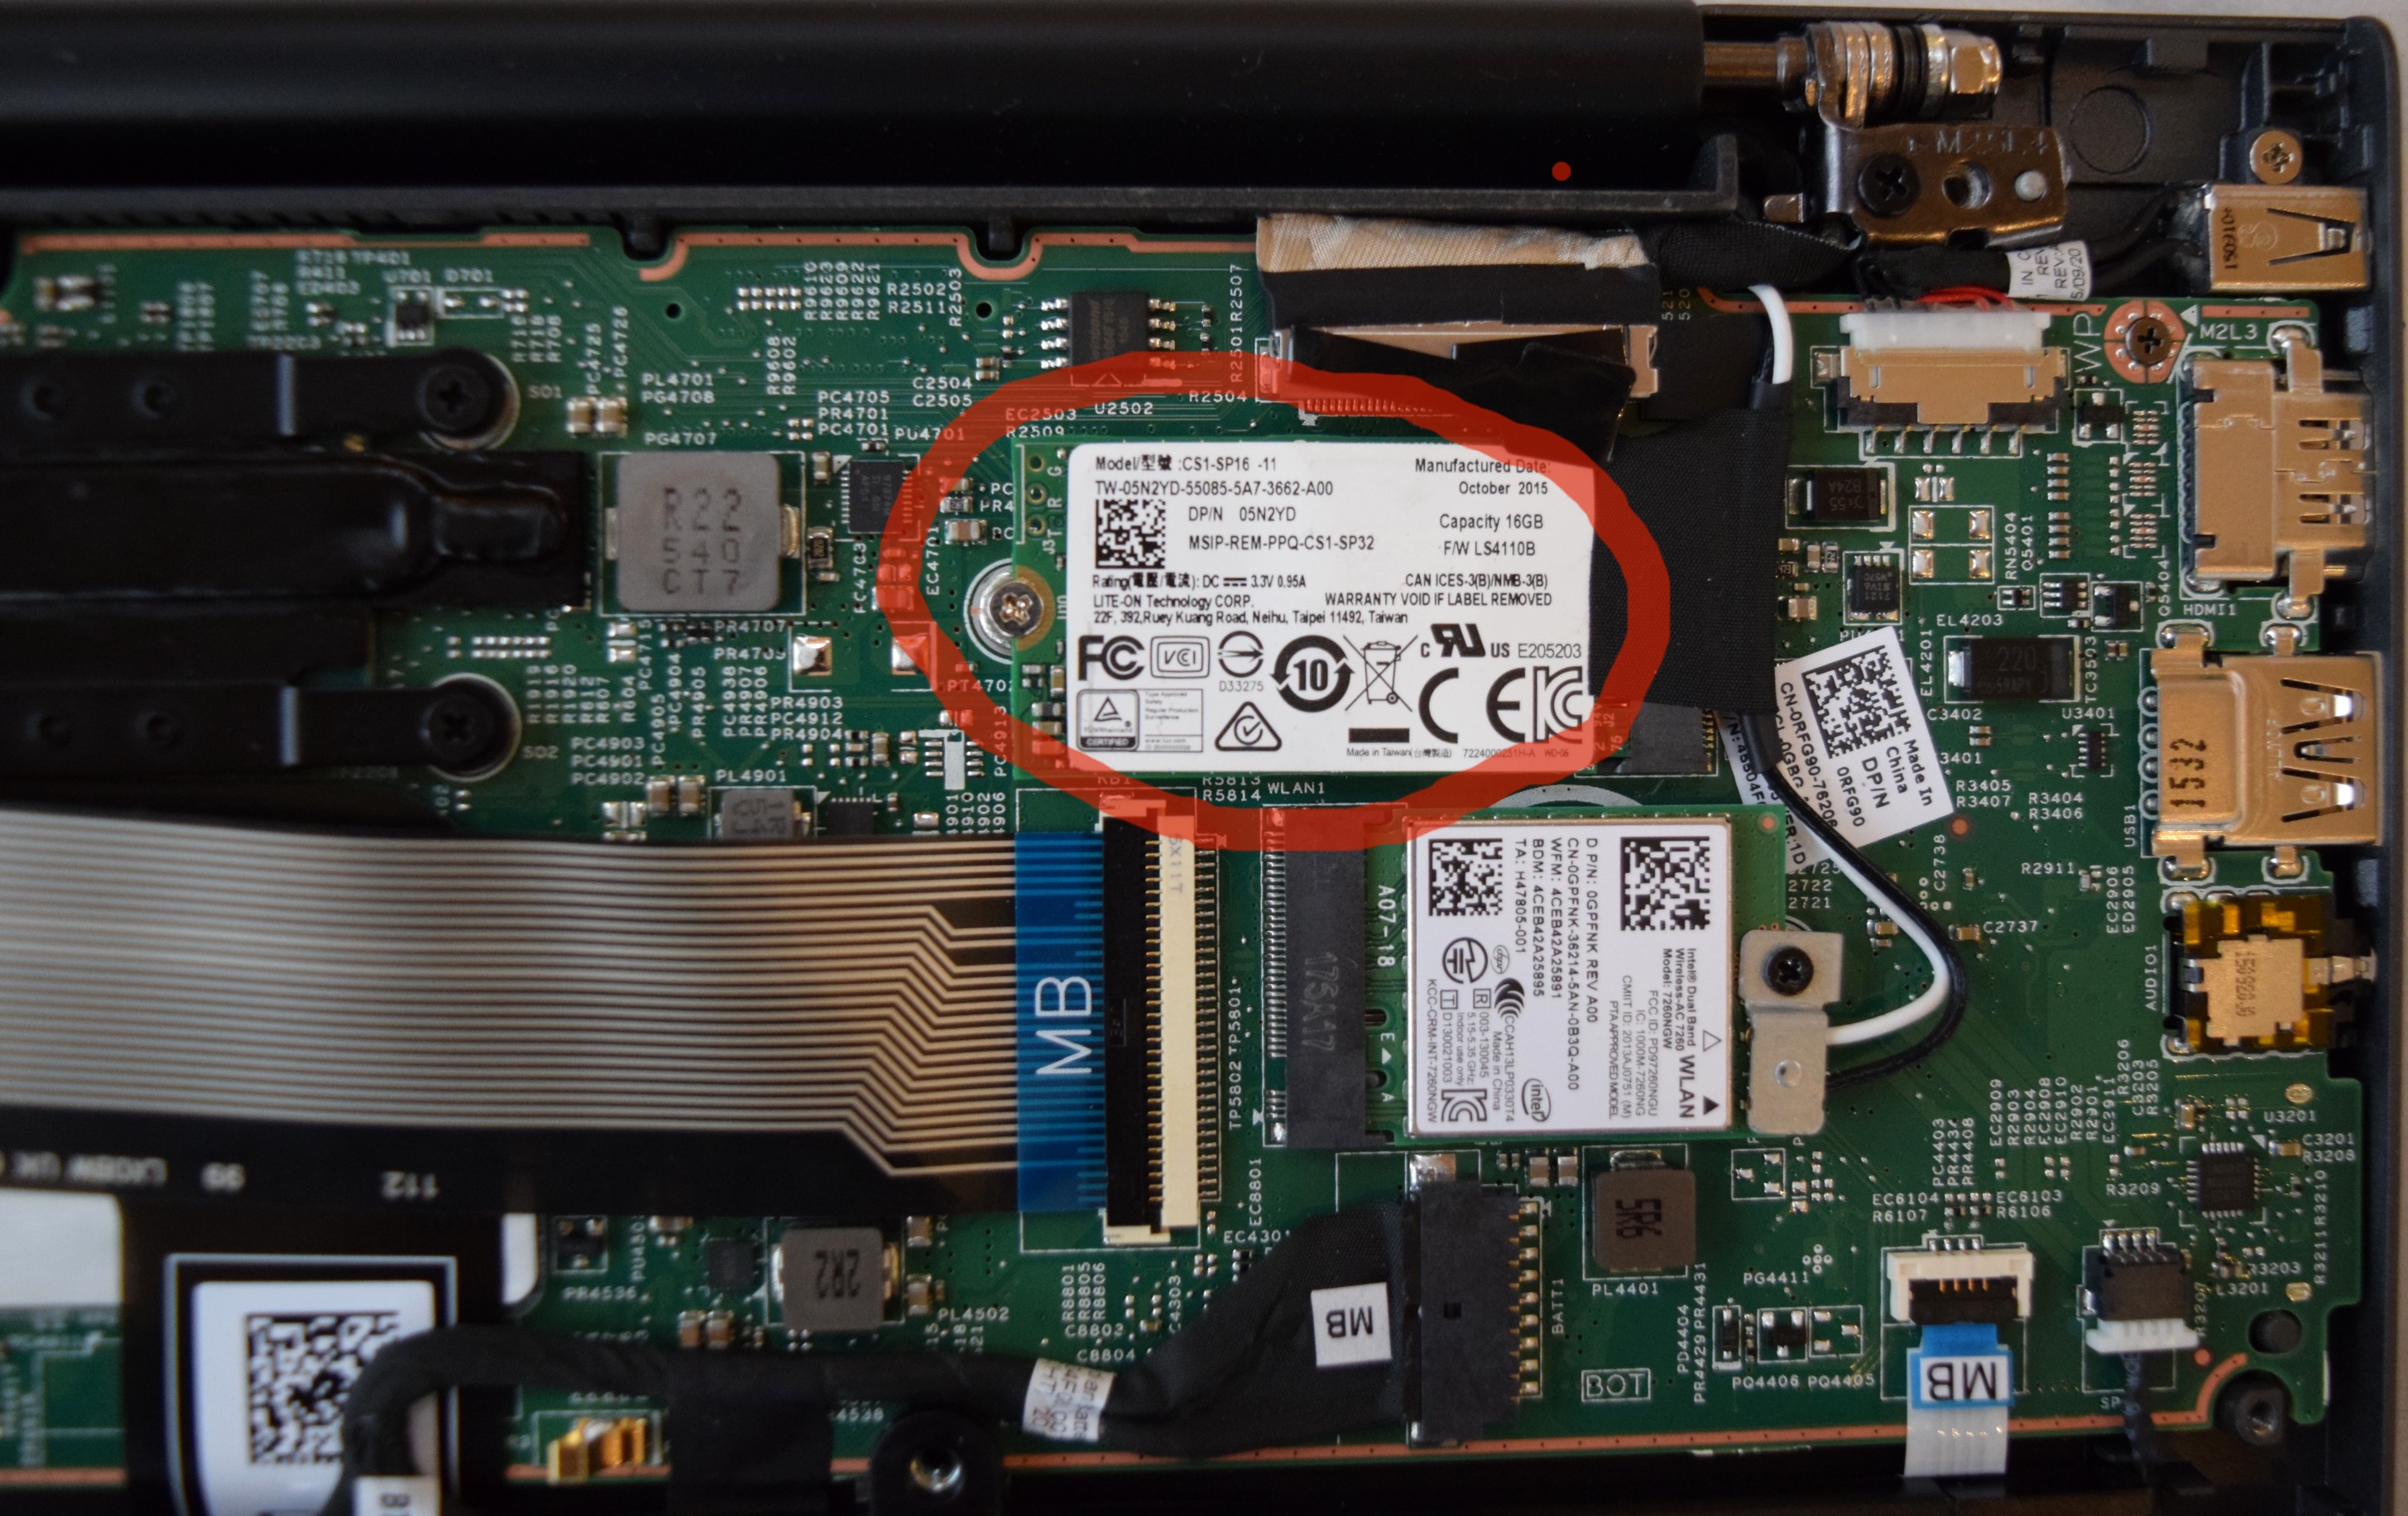
7310.. I’m looking at 16gb capacity ssd made by LITE-On technology. MN= cs1-sp16-11
Thank you so much for this helpful article! One (dumb) question though: I’m currently single-booting Linux on my Dell CB13 (so no ChromeOS installed, but I do have the developer screen at boot!). If I were to replace the SSD, will I still be able to boot up a Live USB of my distro of choice directly to re-install the distro or do I need to restore ChromeOS first to re-flash the BIOS?
Hi,
I could be wrong here, but I don’t see why you would need to re-flash the BIOS, I guess you already have MrChromebox or johnlewis firmware installed in the legacy boot slot, so as long as that’s still there it should give you the option of booting from USB and installing a distro on the empy SSD. (MrChromebox is better for this since it makes the SSD the primary boot device, with the johnlewis firmware it will default to USB, which is ok for installing a distro but then becomes a pain on subsequent boots)
i read the comment of Transcend’s ssd page on amazon,
and the top comment said he need to disabling ALPM on his Acer C720 .
does dellcb13 also need to do that?
I doubt there is any problem, I believe Transcend fixed this issue :
https://www.reddit.com/r/GalliumOS/comments/4f9d7r/m2_ssd_upgrade_on_acer_c720_worth_the_hassle_alpm/
https://www.amazon.com/review/R2VQMJ7DTF6NIM/ref=cm_cr_dp_cmt?ie=UTF8&ASIN=B00KLTPUU0&channel=detail-glance&tag=pape03-20&nodeID=541966&store=pc
tks~
any idea if the wifi card is replaceable? i’m gonna hackintosh it and need to replace it with a broadcom card for wifi to work with os x.
Haven’t tried it but looks like it shouldn’t be a problem, good luck!
Bought the Dell CB 13 – the BIOS write/protect screw was smaller than the other Philips screws – so I ended up stripping it. I had to fricking use a Dremel tool to remove the screw. Finally got it to work and flashed it with CoolStar’s ROM: https://docs.google.com/document/d/1nFZmoRzQ03btPCGVSa4ku6JPQik-SxD__zOd1CoB2yg/edit
Specifically this: https://dl.dropboxusercontent.com/u/59964215/chromebook/ROM/coreboot-seabios-lulu-20160311-coolstar.rom
And was able to remove the stupid “Developer’s Mode” bootup at startup. Why is this important? Because I gave it to my dad who isn’t tech savvy, and whenever the battery dies out, after a few days ago, all the flags for booting the computer to skip developer mode gets reset, forcing you to go back into ChromeOS (if you still have it installed), to re-enable the flags.
Flashing with coolstar’s rom prevents this dumb issue from happening & even lets you run Windows on it (only issue with this currently is that trackpad doesn’t work in Windows, not that I use windows, I use elementary OS).
Oh yeah to anyone who wants to do this –> to flash the bios yo have to enable developer mode in ChromeOS -> ctrl+ alt + T in chromer browser -> in crosh type “shell” -> then make a backup of your rom using sudo flashrom -r backup.bin in a folder ideally the downloads folder. Then when you’ve backed it up (email or put this file on USB), download CoolStar’s ROM for the Dell CB13, then do sudo flashrom -w coolstarsrom.bin
// Guess why Dell labeled m.2 header with MSATA name?
Today I was looking around for recommendation on SSD replacement. I realized that this isn’t so obvious as I’ve tough at first. M.2 2242 market is struggling from price limits. I found only 2 brands offering DRAM on their 2242 models – ADATA SP600 128\256 & Plextor M6G 128 (seems 64Gb too). KingMax offers DRAM too… but I found it online only on TaoBao 8] . Sandisk has something on X400s 256 about caching I guess.
Same thing about internal card readers, as wise ppl say they almost using USB 2.0 under the hood. So, stay calm and keep googling.
Thanks for this “Easy-to-do” article. I will buy my Dell CB13 as soon as I have found the right model I need. It’ll be the main hardware, with Ubuntu (or Elementary) on it (crouton/direct, I still don’t know). So, the Celeron is good enough or should I go direct to the i3?? The price difference is only €80 between these two models. For the SSD, I think about a ZTC of 128 or 256 (or the big 512 if I have a discounted price on it). About the RAM, do you know where the chips are “soldered”?? Have you shots of the opposite side of the main board?? Thanks for all!! 🙂
If you can afford it (and if it’s in stock !) then I think the Core i3 model is worth having just for the sake of future-proofing.
Having said that, the Celeron is also fine, the only place where it lacks a little is gaming, but any other typical usage I’ve tried with it is really not a problem.
ZTC is an interesting brand, there’s not much info about them out there, but reviews on amazon.com are quite good.
Unfortunately I don’t have any additional information about the RAM on this model, I didn’t take it further apart than this, so it does look like it is somewhere on the opposite side of the board.
Hi, thanks for your advice. I will buy the i3 model because, really, €80 is very cheap for a Core i3 vs. a “simple” Celeron. About the RAM, on a French website, the specs show that it seems there is a single slot with an 8GB RAM max (https://www.lambda-tek.fr/DELL-7310-9132~sh/B2567243&viewSpec=y#product-view). If it’s true, then this new Dell 13 is a pure winner!! I will try to get some shots of the back side of the MB.
bTW YOU CAN USE THE CROSH TERMINAL TO USE INTERNAL STORAGE SPACE AS RAM